

Complete a Work Order
Close out a repair with its real cost — the linked issue resolves itself and the service schedule's next due date rolls forward automatically
Completing a work order is one click for the mechanic — and a chain of bookkeeping for the system. This walkthrough follows a preventive service from overdue to done: the schedule goes overdue, Yipii raises the issue and pings the admins itself, the work gets done, and on completion the issue resolves and the schedule's next due date rolls forward. Nobody closes anything by hand.
Every screenshot has desktop and mobile views — flip the tab on any step.
Watch it first
The whole loop in about a minute, then follow the steps below.
What you'll do
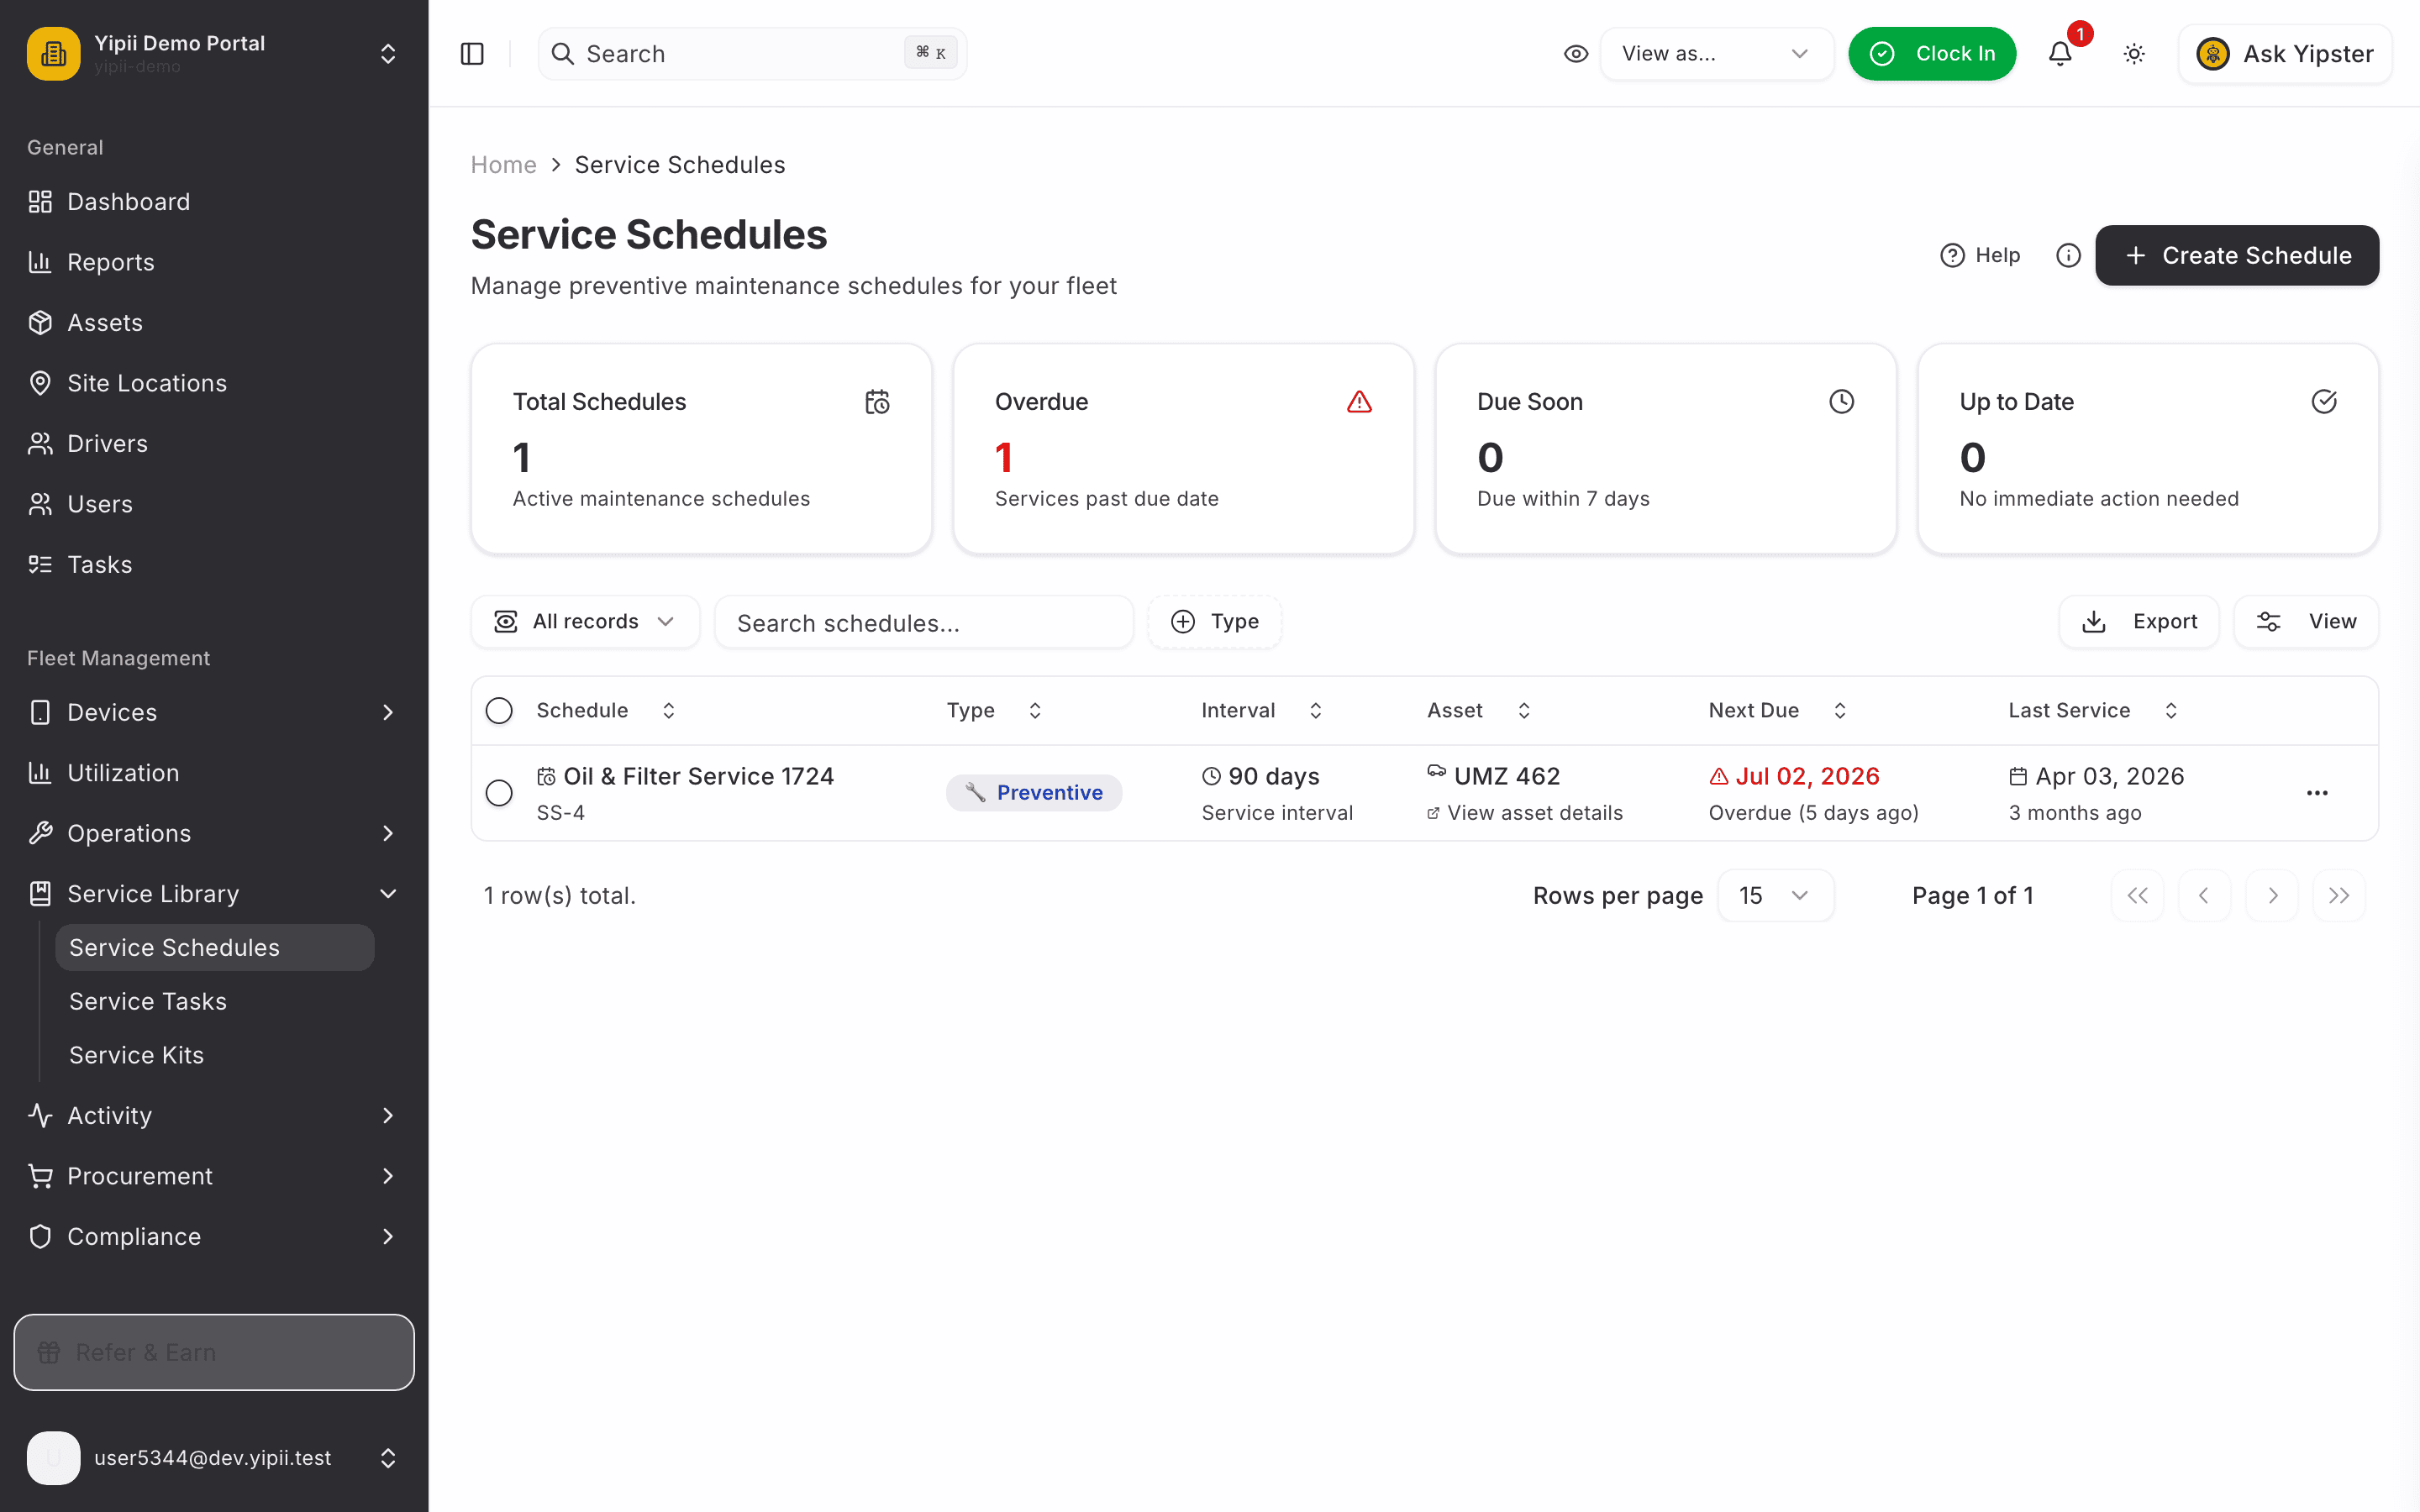
1. A service is overdue
Service Library → Service Schedules. The 90-day oil and filter service on this van slipped past its due date — the row flags Overdue and the stats card counts it in red.
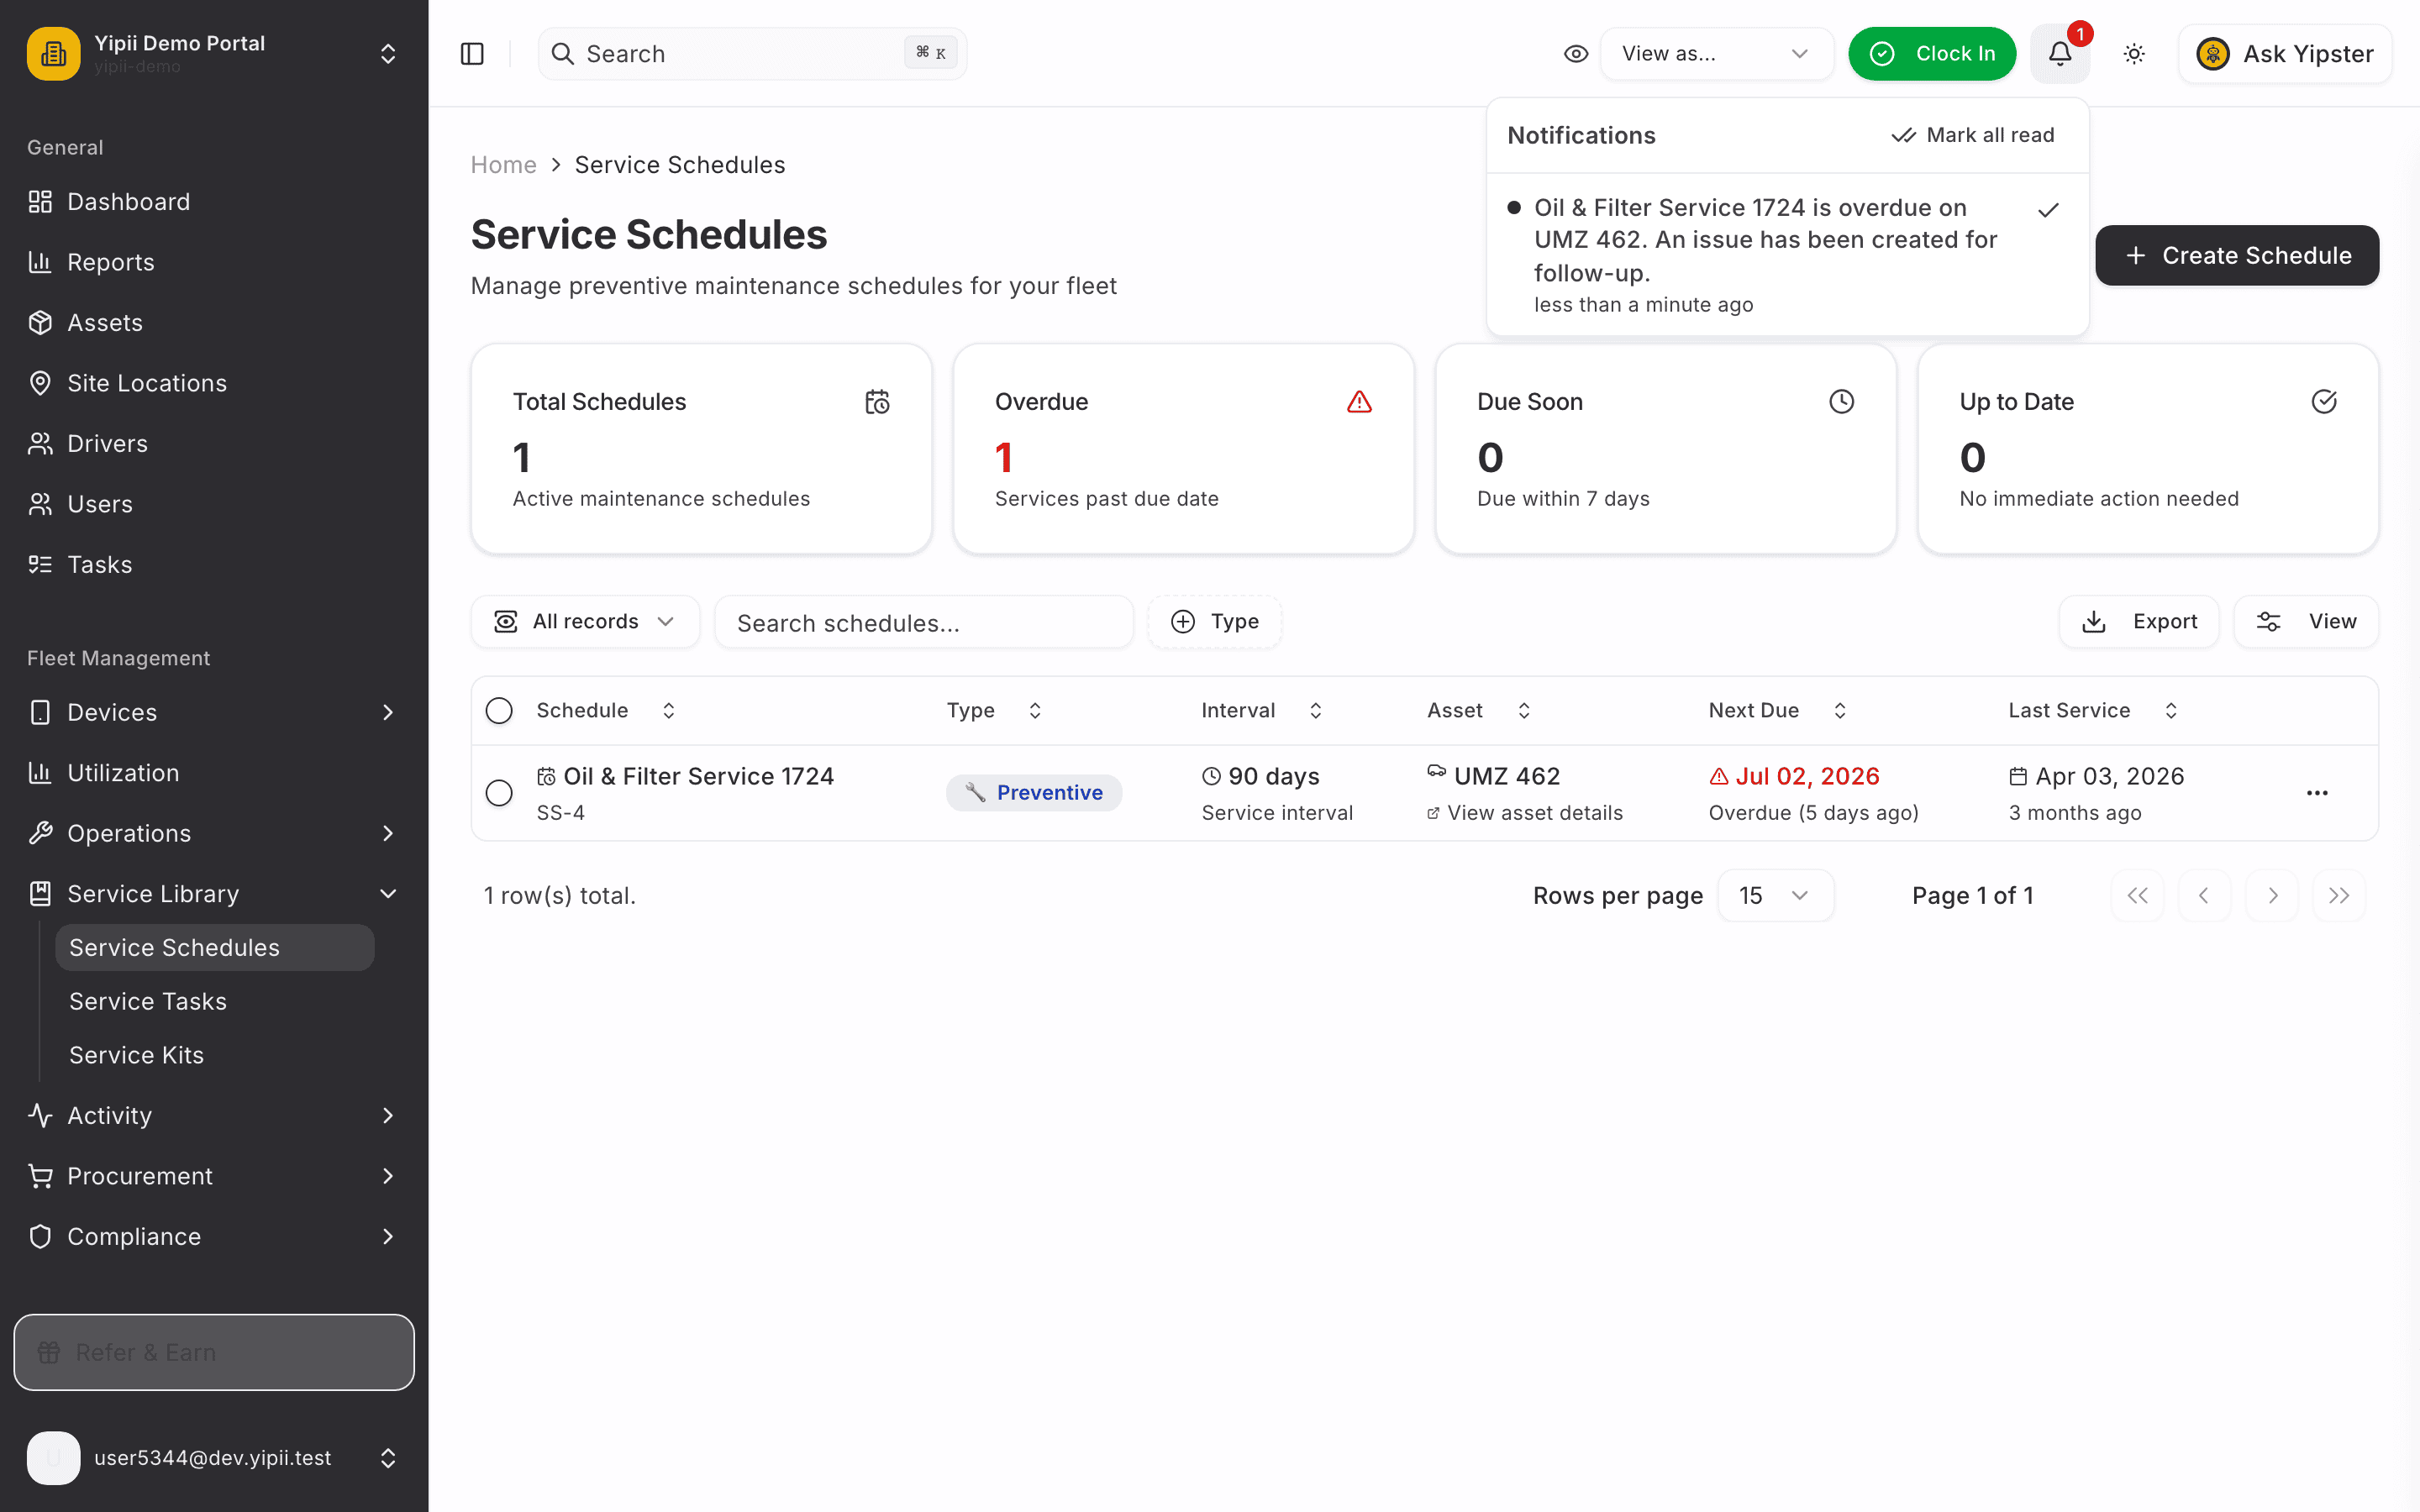
2. The system already raised the alarm
No one had to notice. The nightly check spotted the overdue schedule, logged an issue against the vehicle, and dropped a notification in every admin's bell.
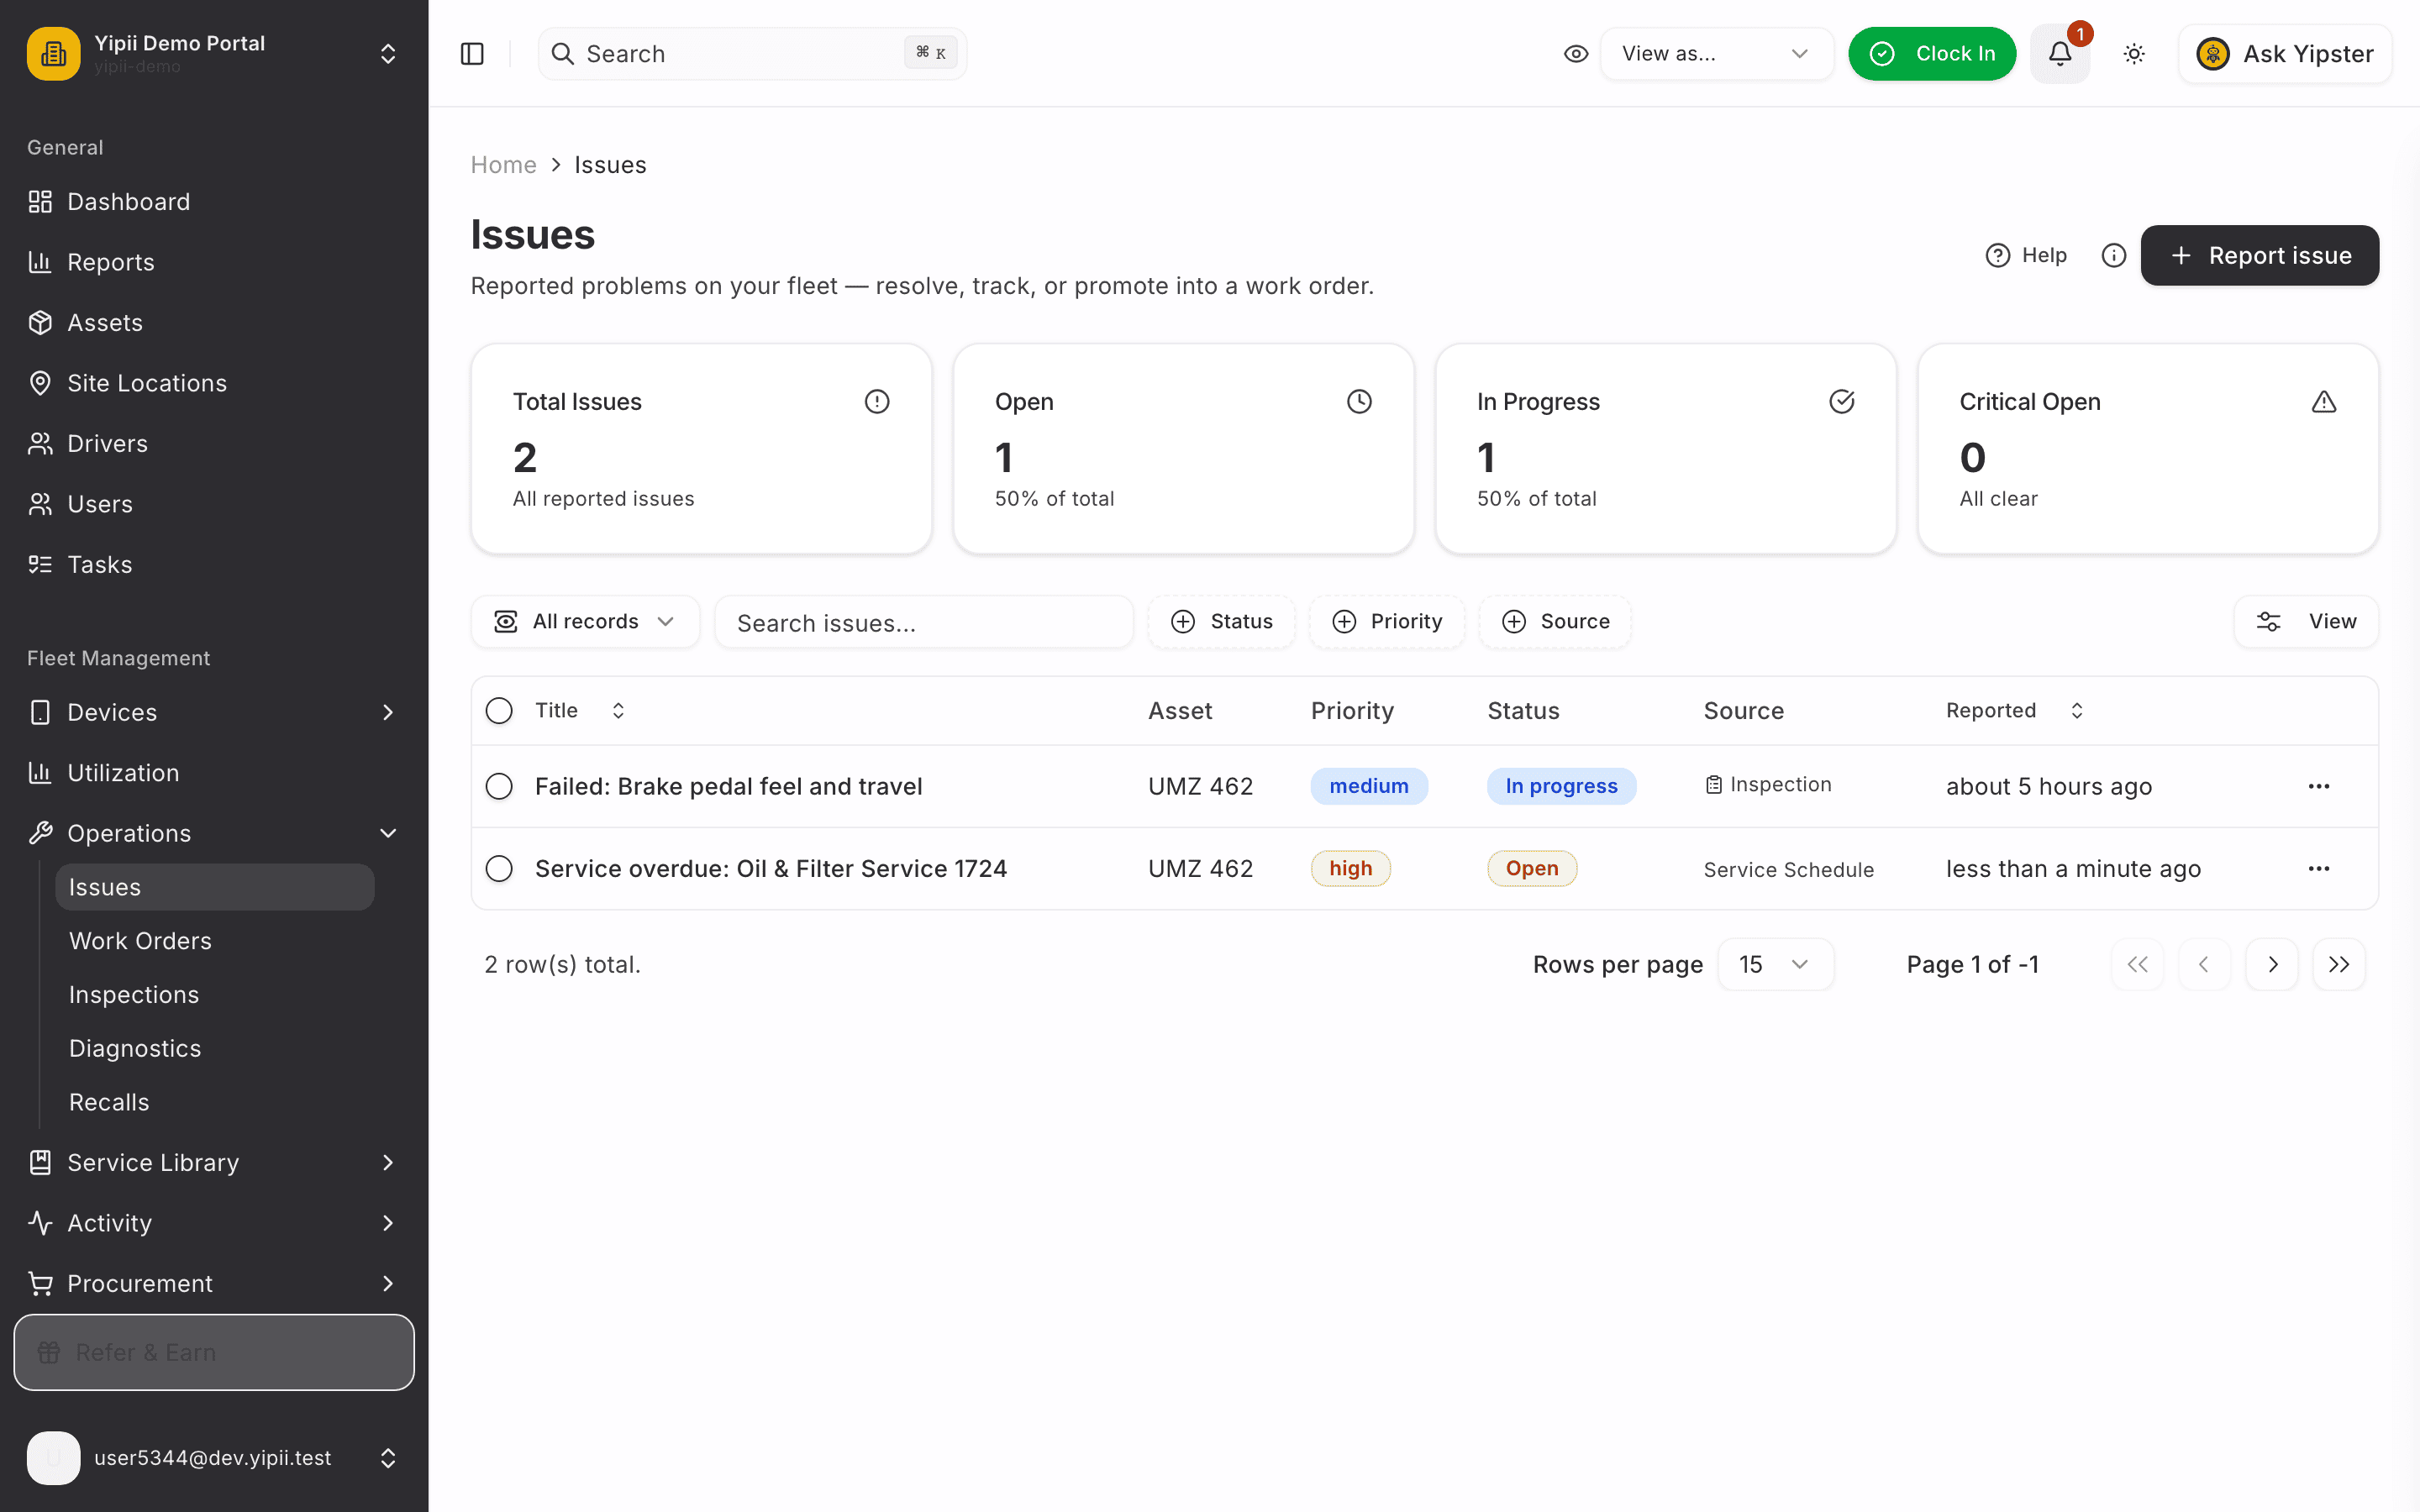
3. The issue is on the board
Operations → Issues. The auto-created issue carries everything a manager needs to triage: the schedule it came from, the vehicle, high priority, source Service schedule.
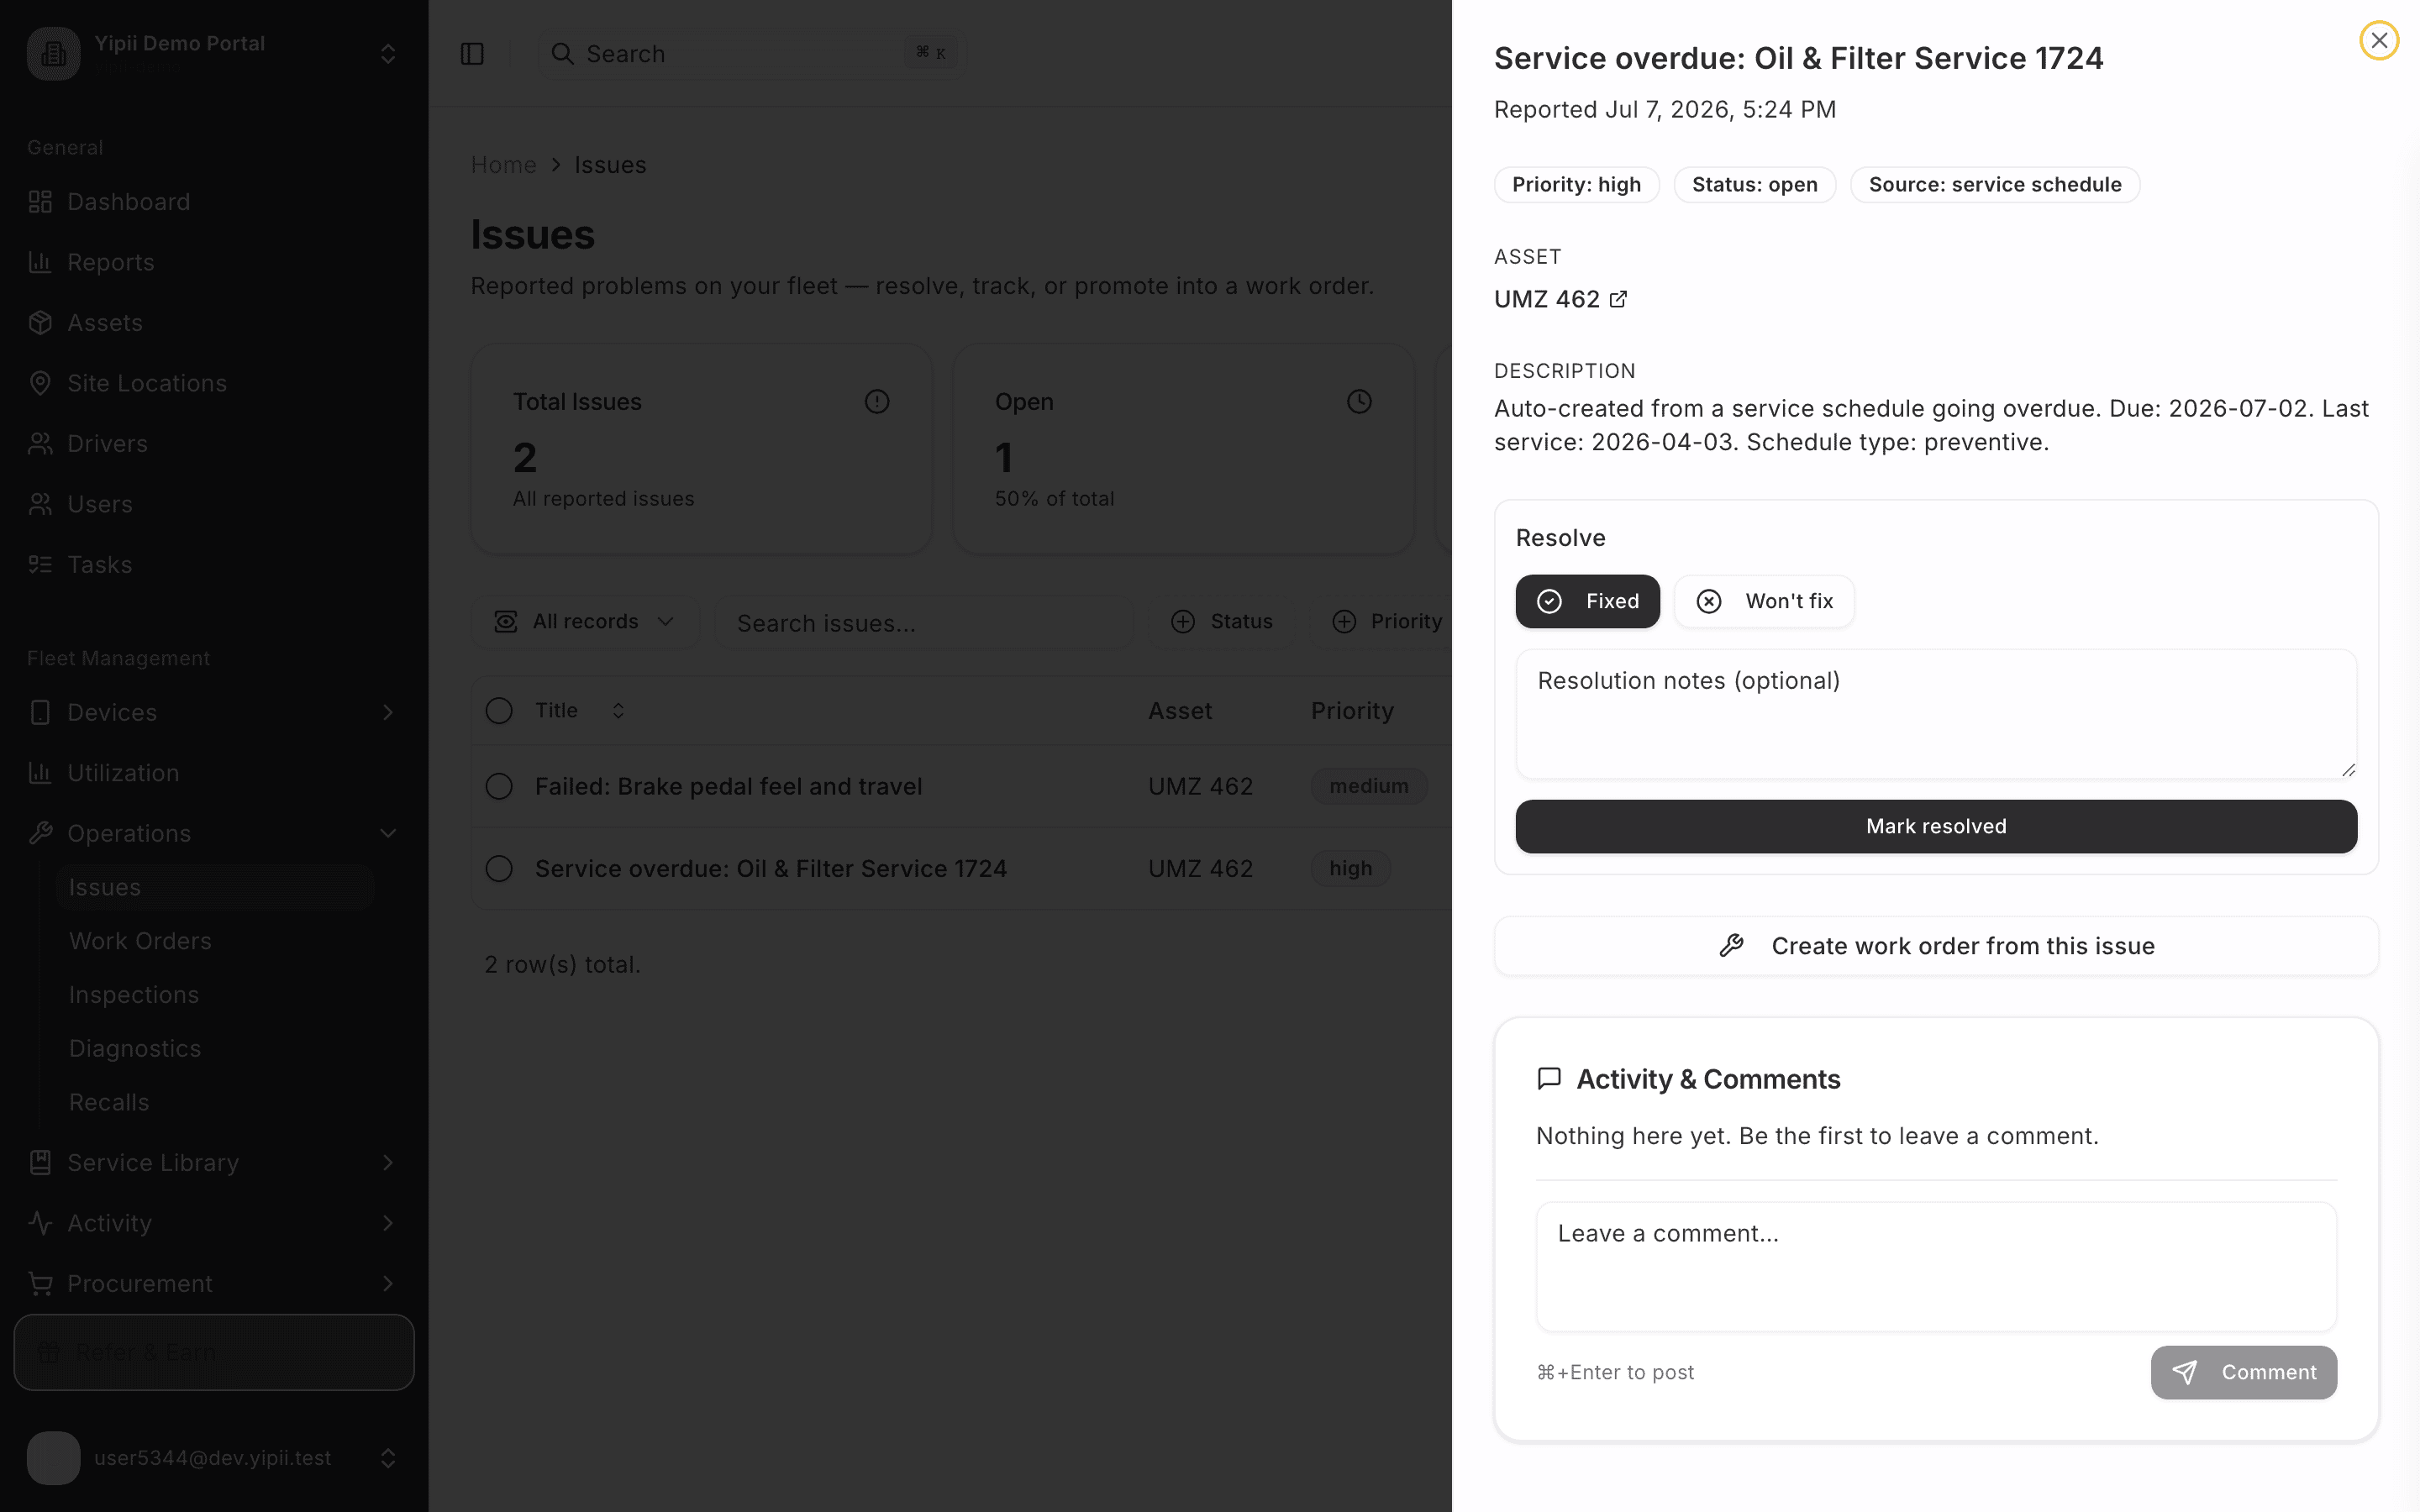
4. Promote it to a work order
Open the issue and click Create work order from this issue — title, description and priority carry over, and the work order stays linked to the issue for the closing act.
5. The work order, ready for the mechanic
The corrective work order is open against the van. Assign it, add parts and labor as the work happens (see Create a Work Order with Parts & Labor), or go straight to completion for a quick job.
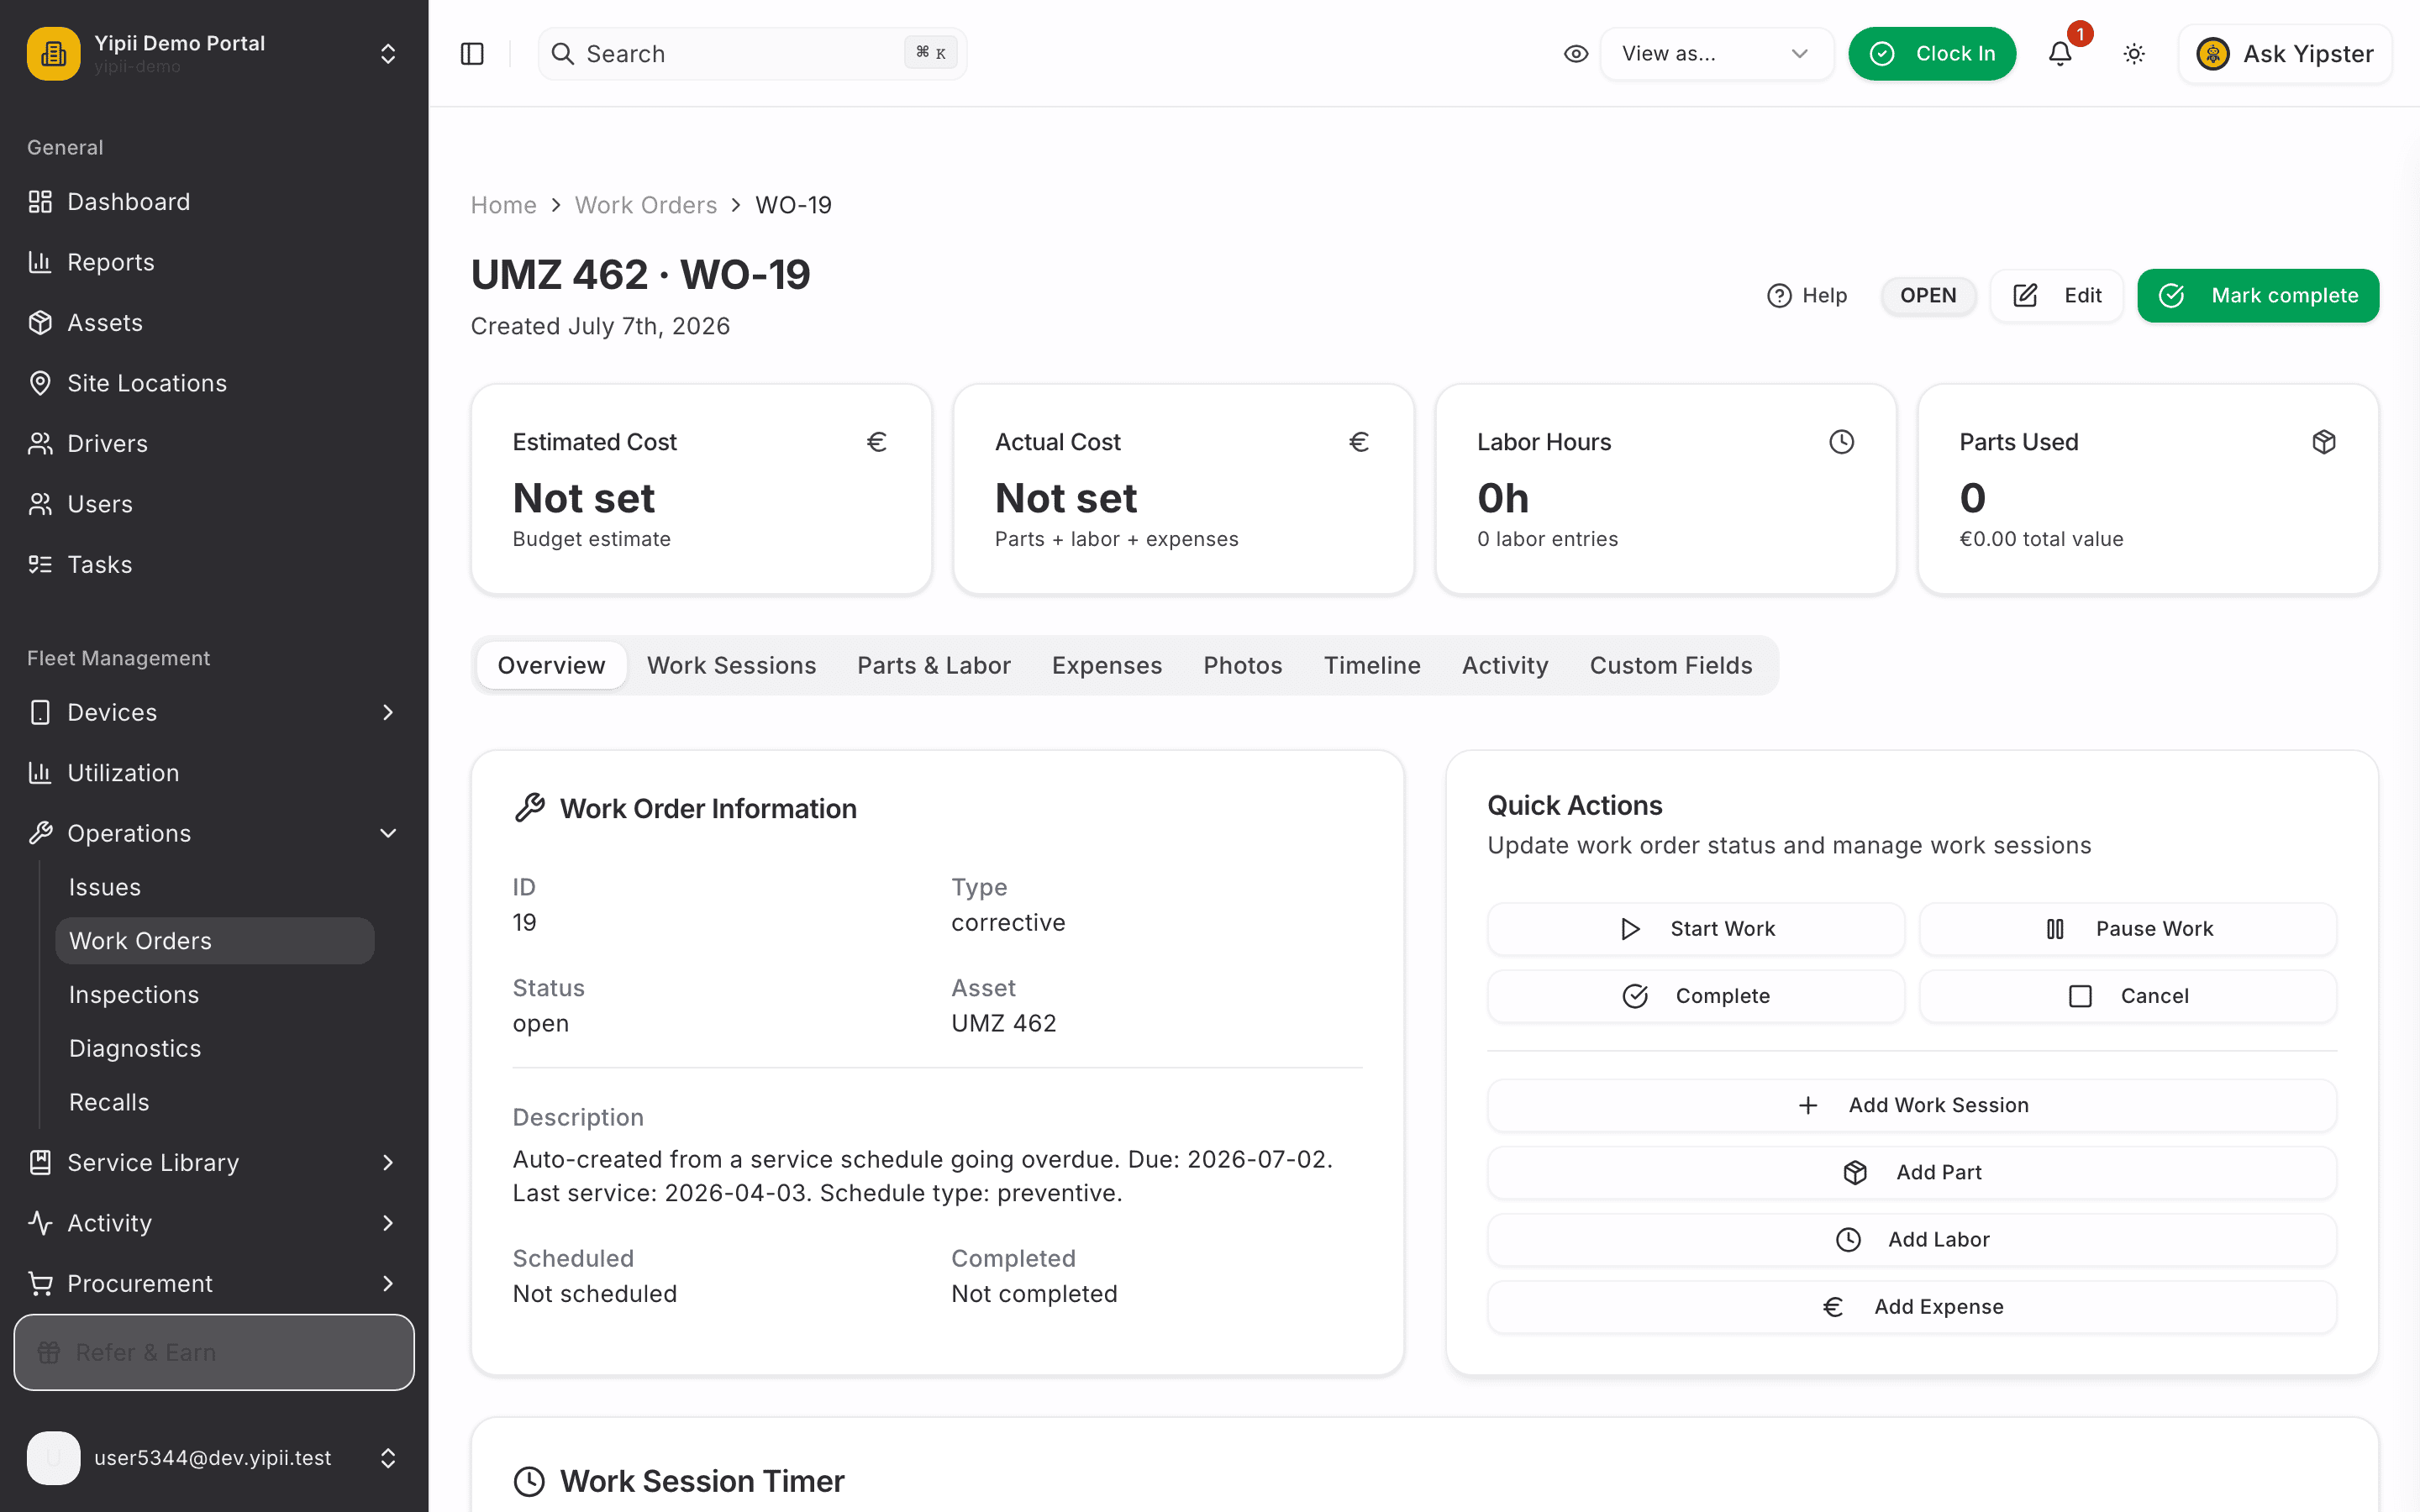
6. Mark complete
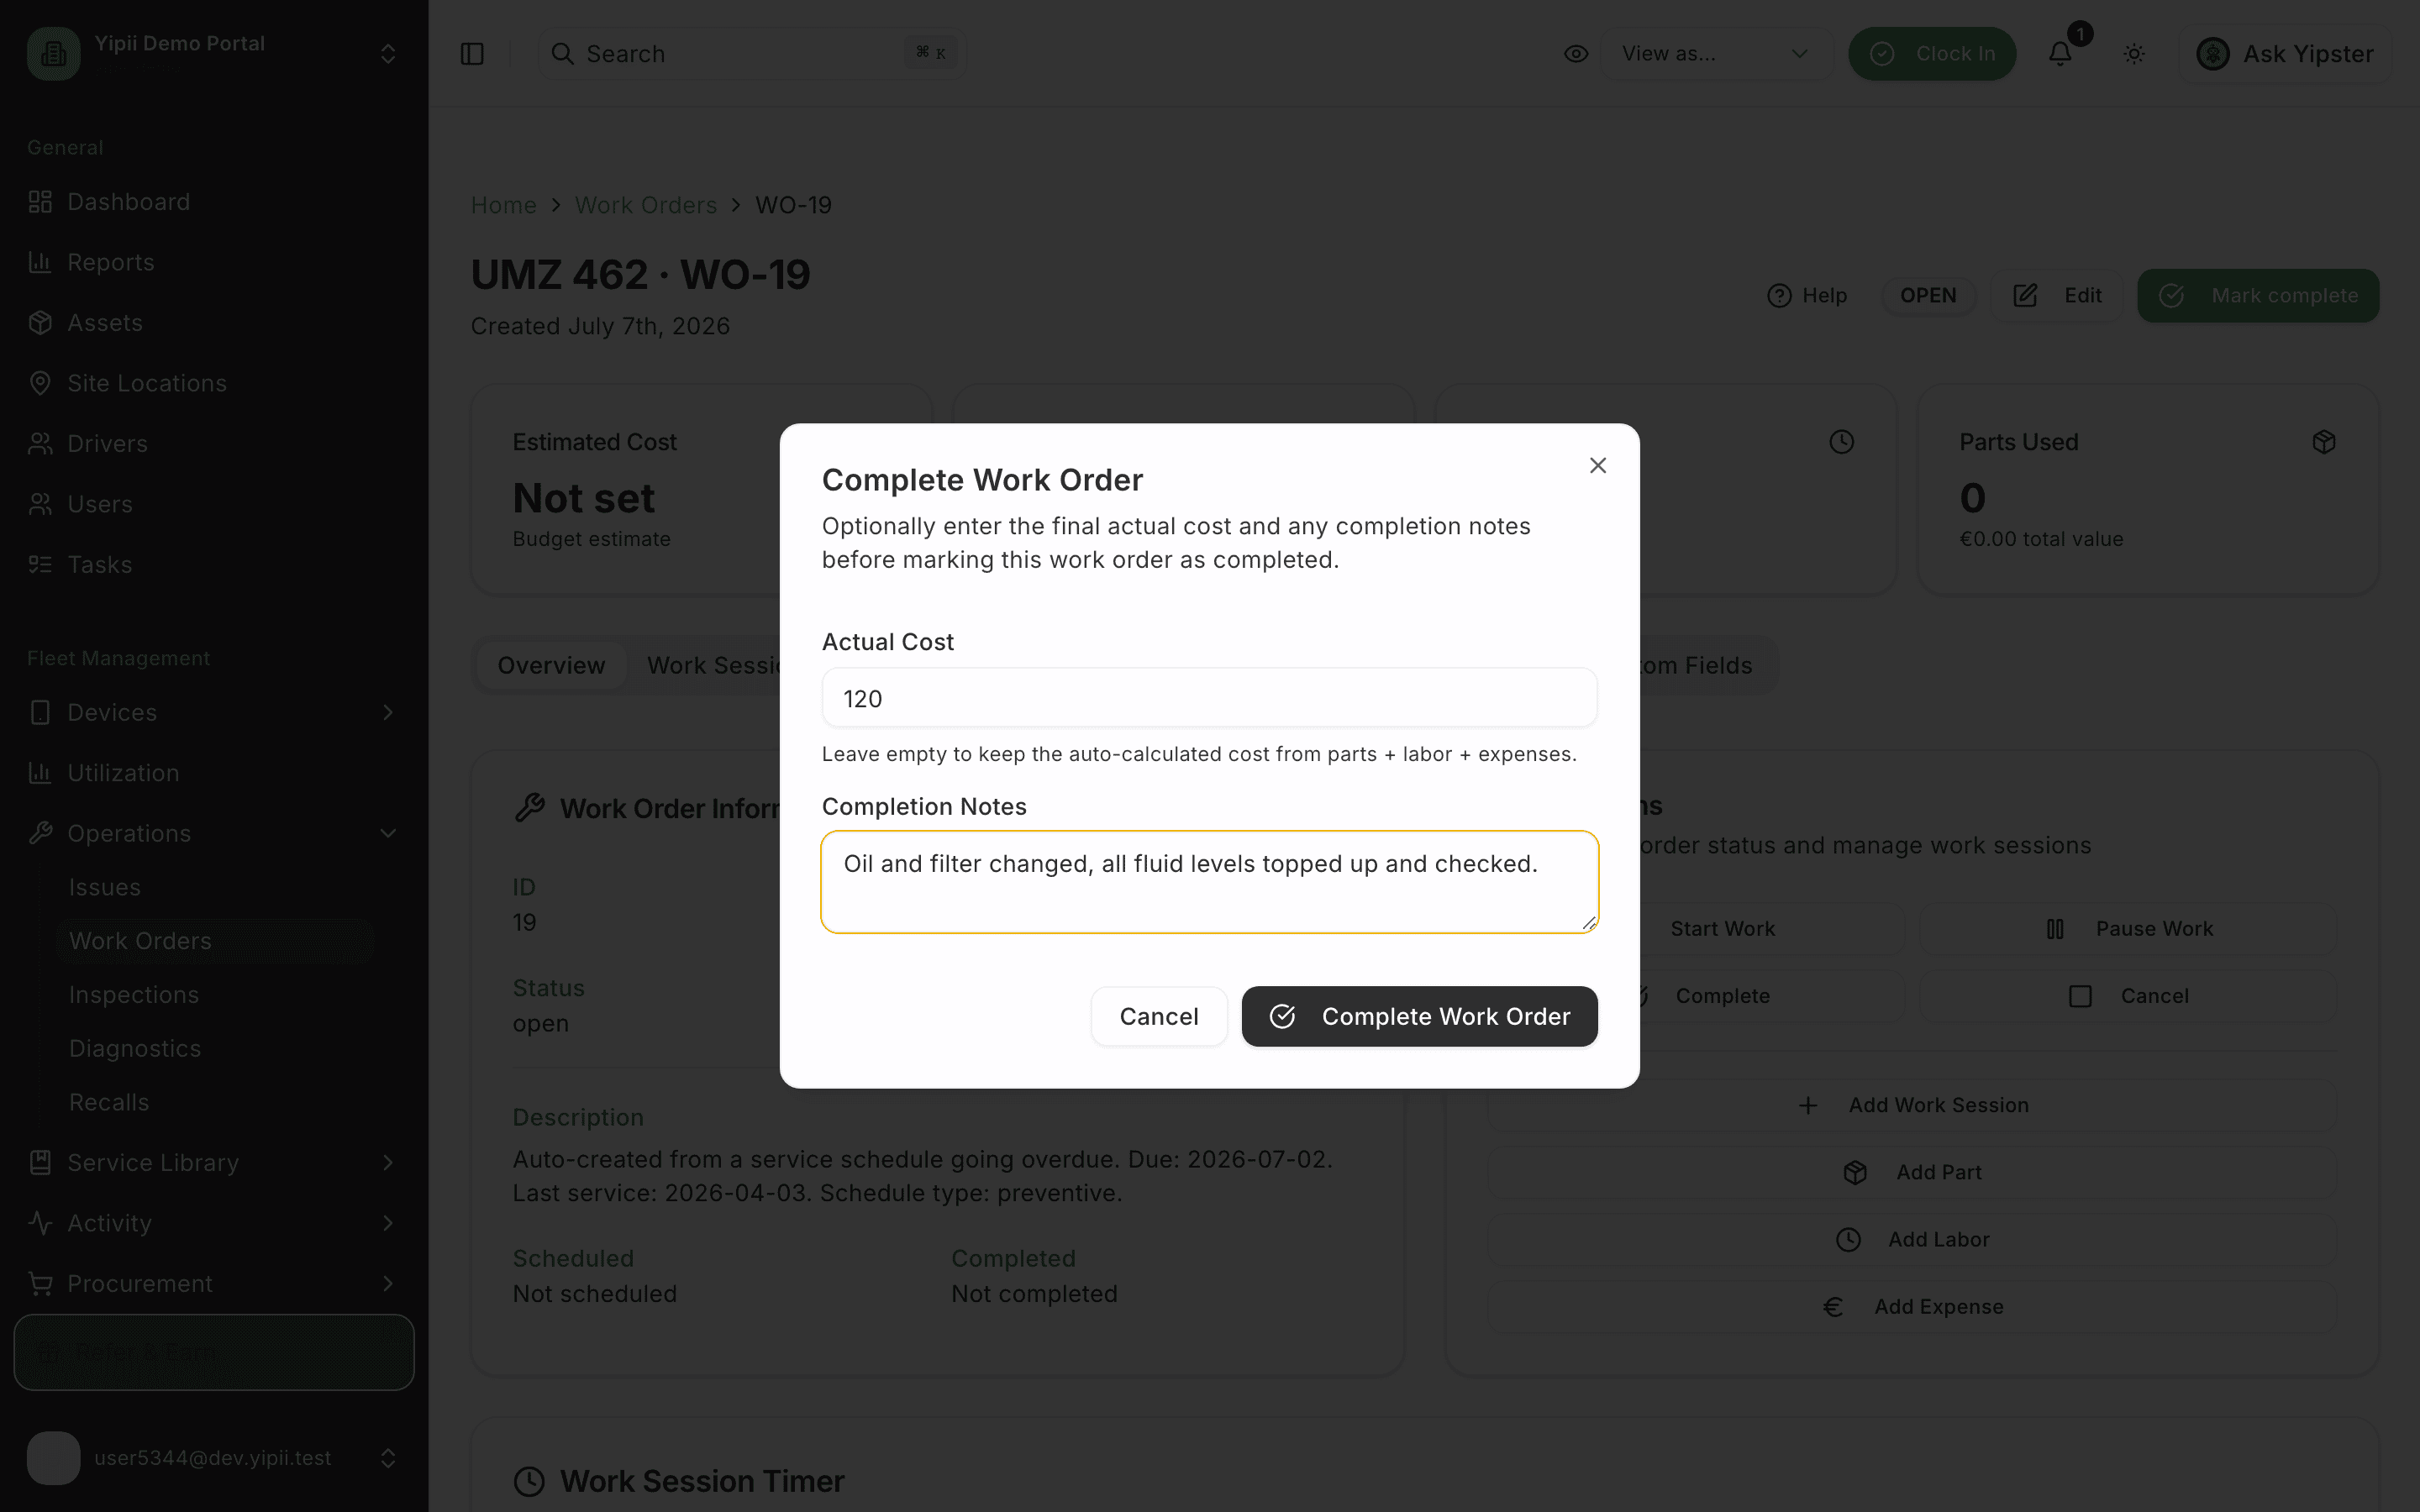
Click Mark complete. Record what the job actually cost and any completion notes for the vehicle's history, then confirm.
Leave the actual cost empty if you recorded parts, labor and expenses — Yipii calculates it from those. Enter a figure only to override.
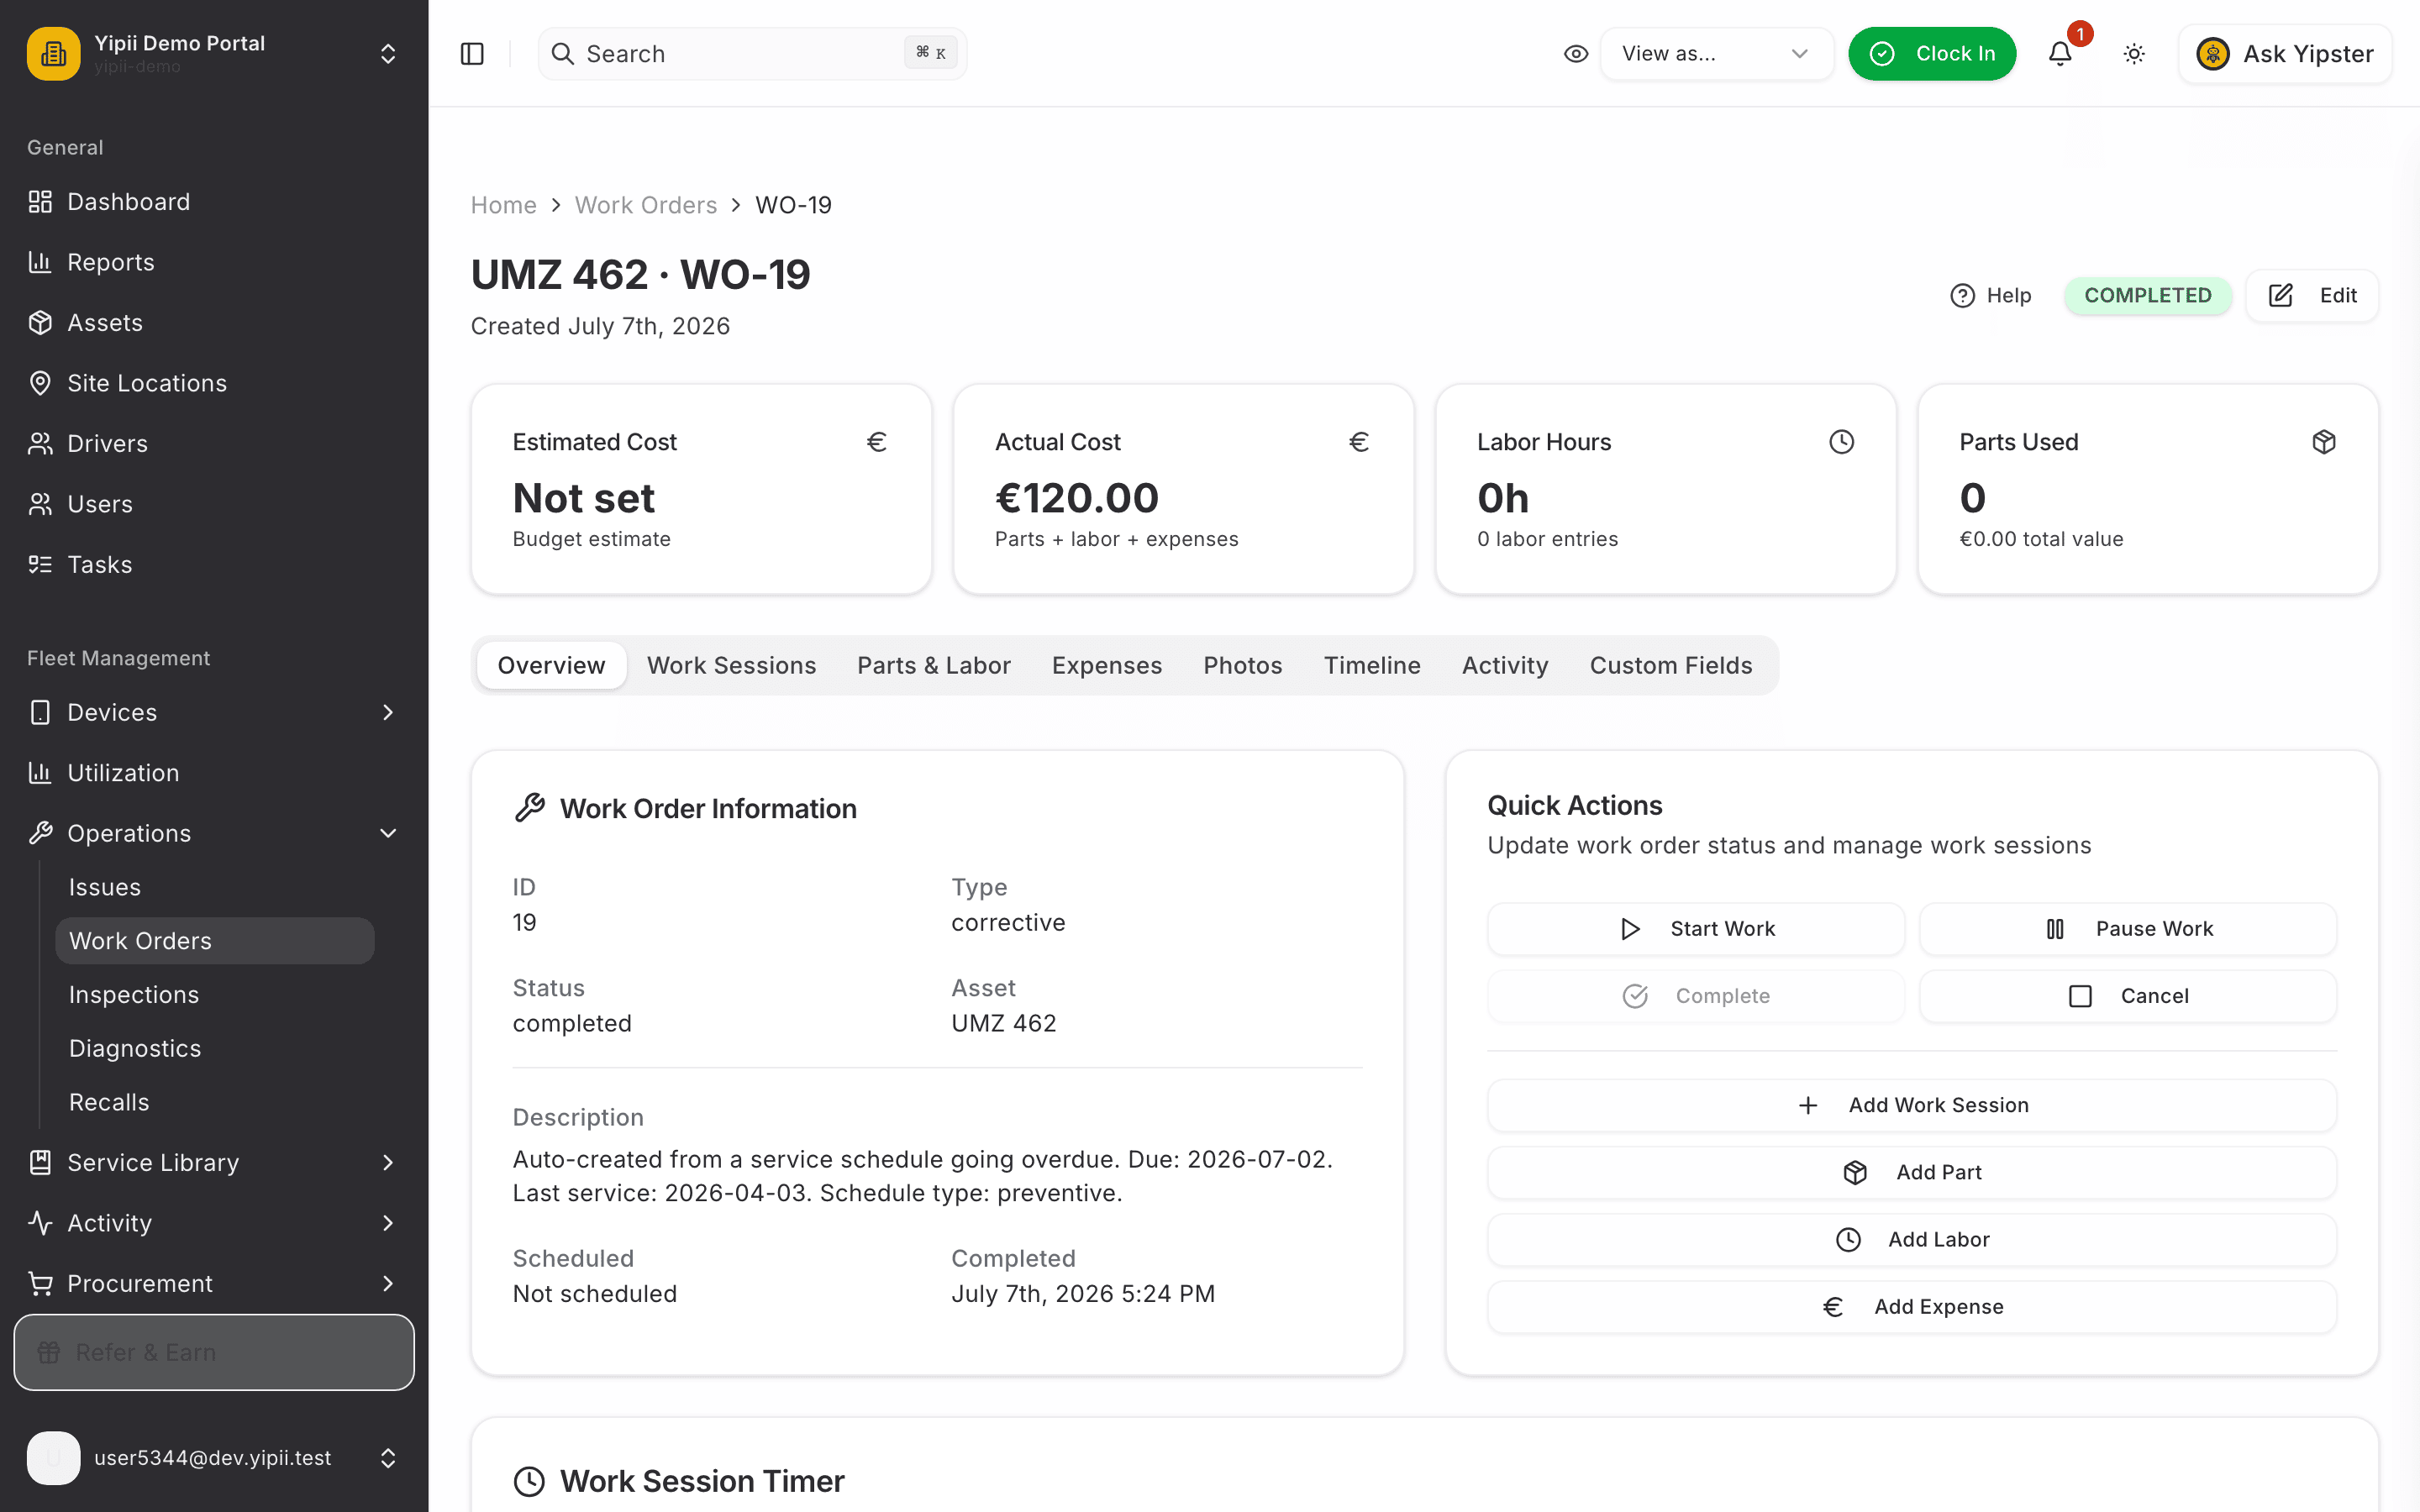
7. Done — and the chain reaction starts
The work order flips to Completed with its final cost. From here the system closes the rest of the loop itself.
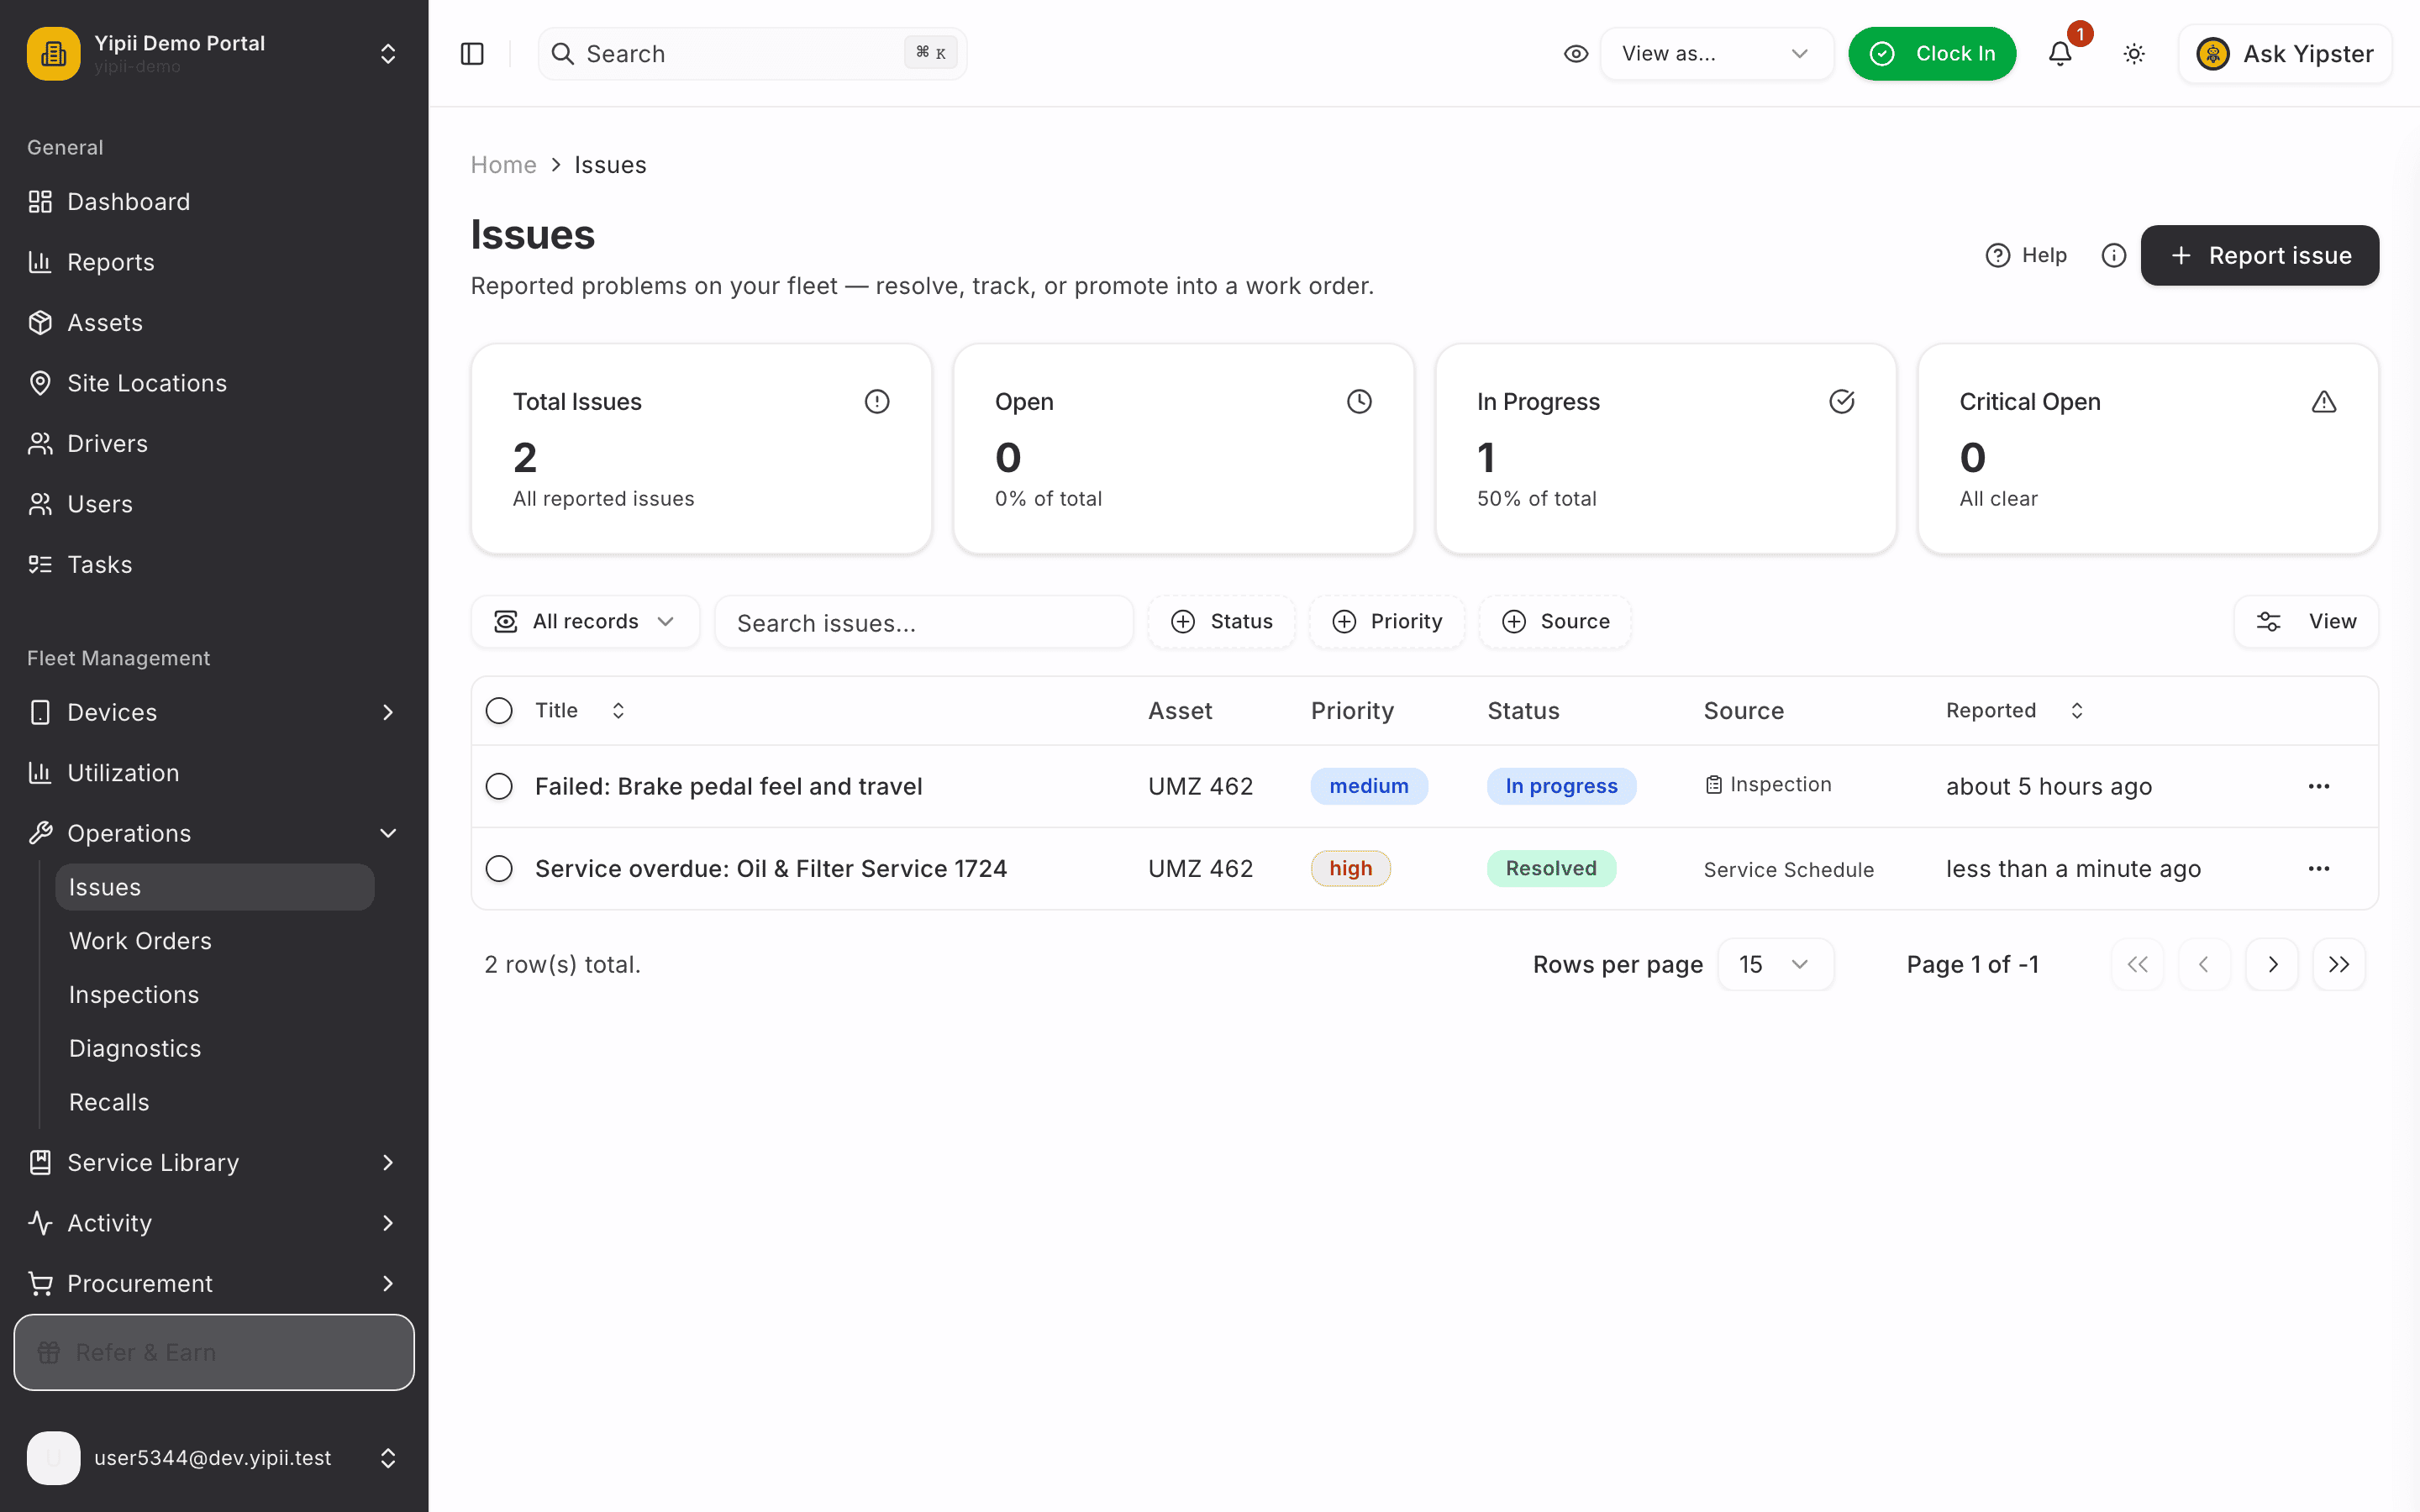
8. The issue resolved itself
Back on the Issues board: the issue that raised this work is Resolved, stamped with when. If a person had reported it, they'd be notified their problem is fixed.
9. The schedule rolled forward
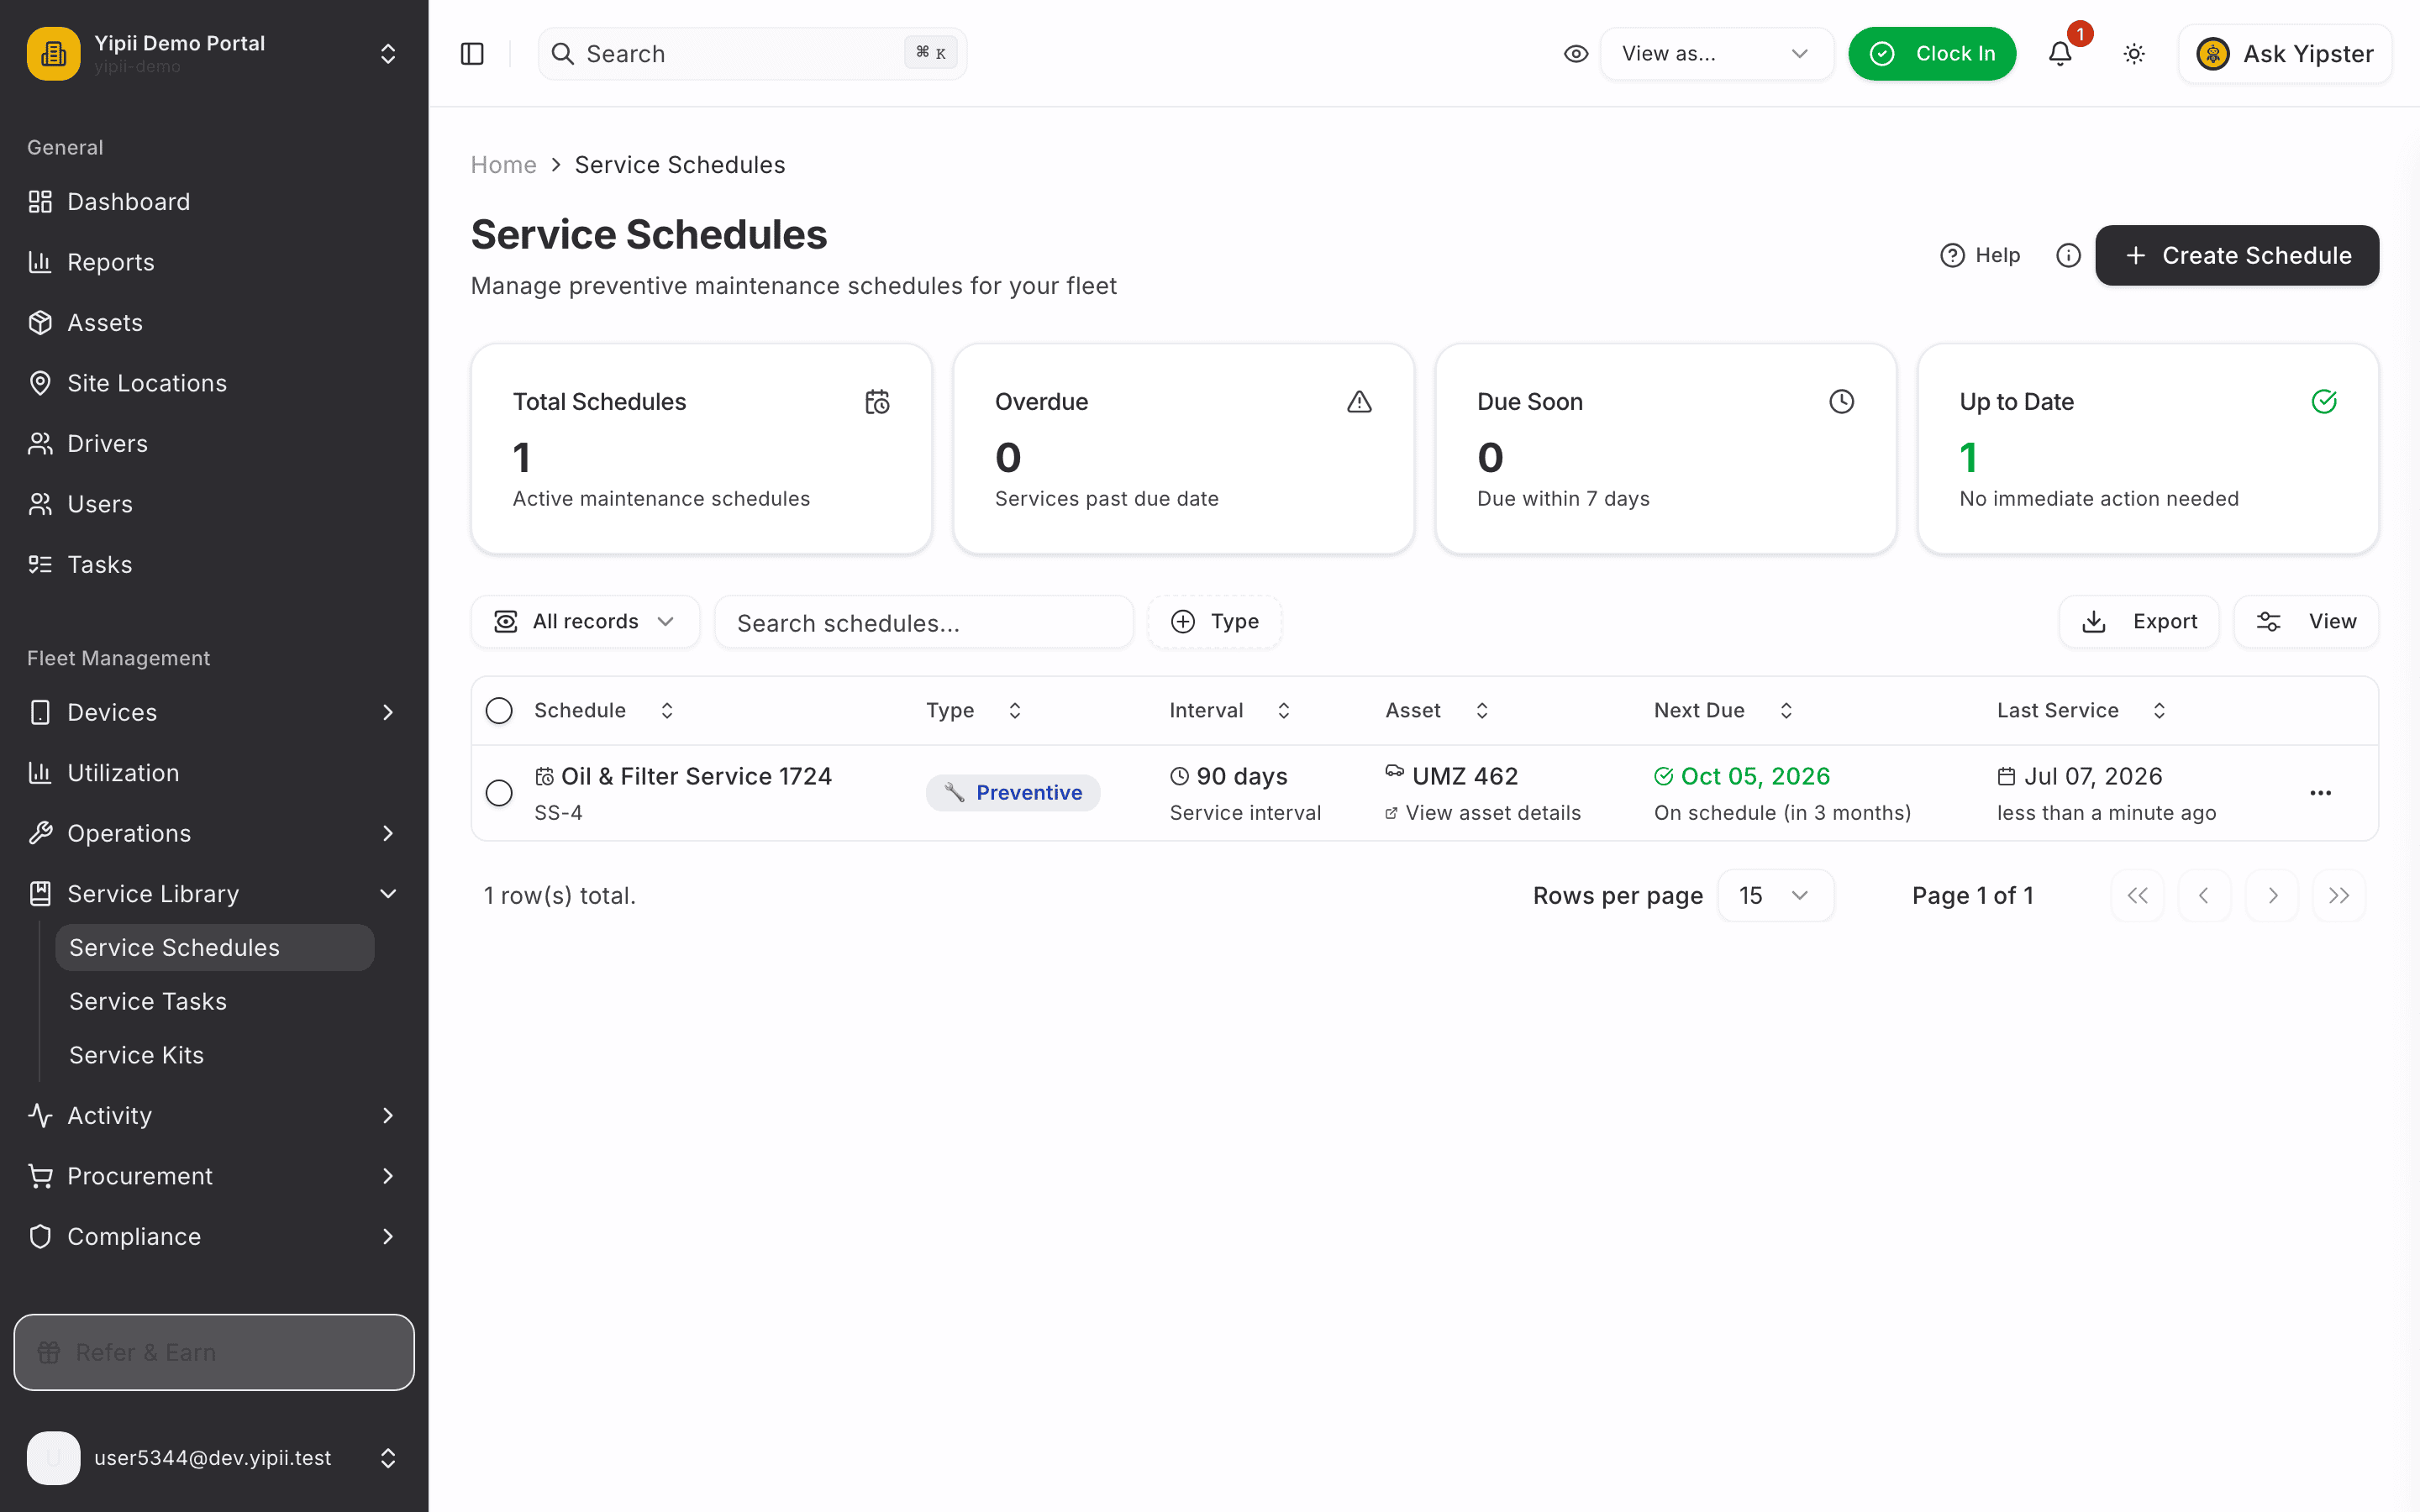
And on Service Schedules: Overdue 0, Up to Date 1. Last service is today, and the next due date has rolled forward a full interval — the 90-day clock restarts from the completed work, ready to raise the alarm again next time.
What you ended up with
- A completed work order with actual cost and completion notes on the vehicle's record.
- A resolved issue — closed by the completion, not by a person.
- A reset service schedule — last service stamped, next due rolled forward one full interval.
- A paper trail throughout: the overdue alert, the auto-created issue, the work order and its costs, all linked.
That's the full preventive loop: schedule → alarm → issue → work order → completion → schedule, hands-free at both ends.