

Failed Inspection → Issue → Work Order
A failed inspection item automatically becomes a triaged issue — promote it to a work order and track the fix to completion
This is the triage loop that keeps failed checks from falling through the cracks — and most of it happens automatically. The moment an inspection item is marked Fail, Yipii logs an Issue against the vehicle: the failed item, the inspector's notes, and a link back to the inspection. A manager then promotes the issue to a Work Order that tracks the fix through to completion.
Every screenshot shows the same brake failure in desktop and mobile views — flip the tab on any step.
Watch it first
Watch the whole loop in about a minute, then follow the steps below.
What you'll do
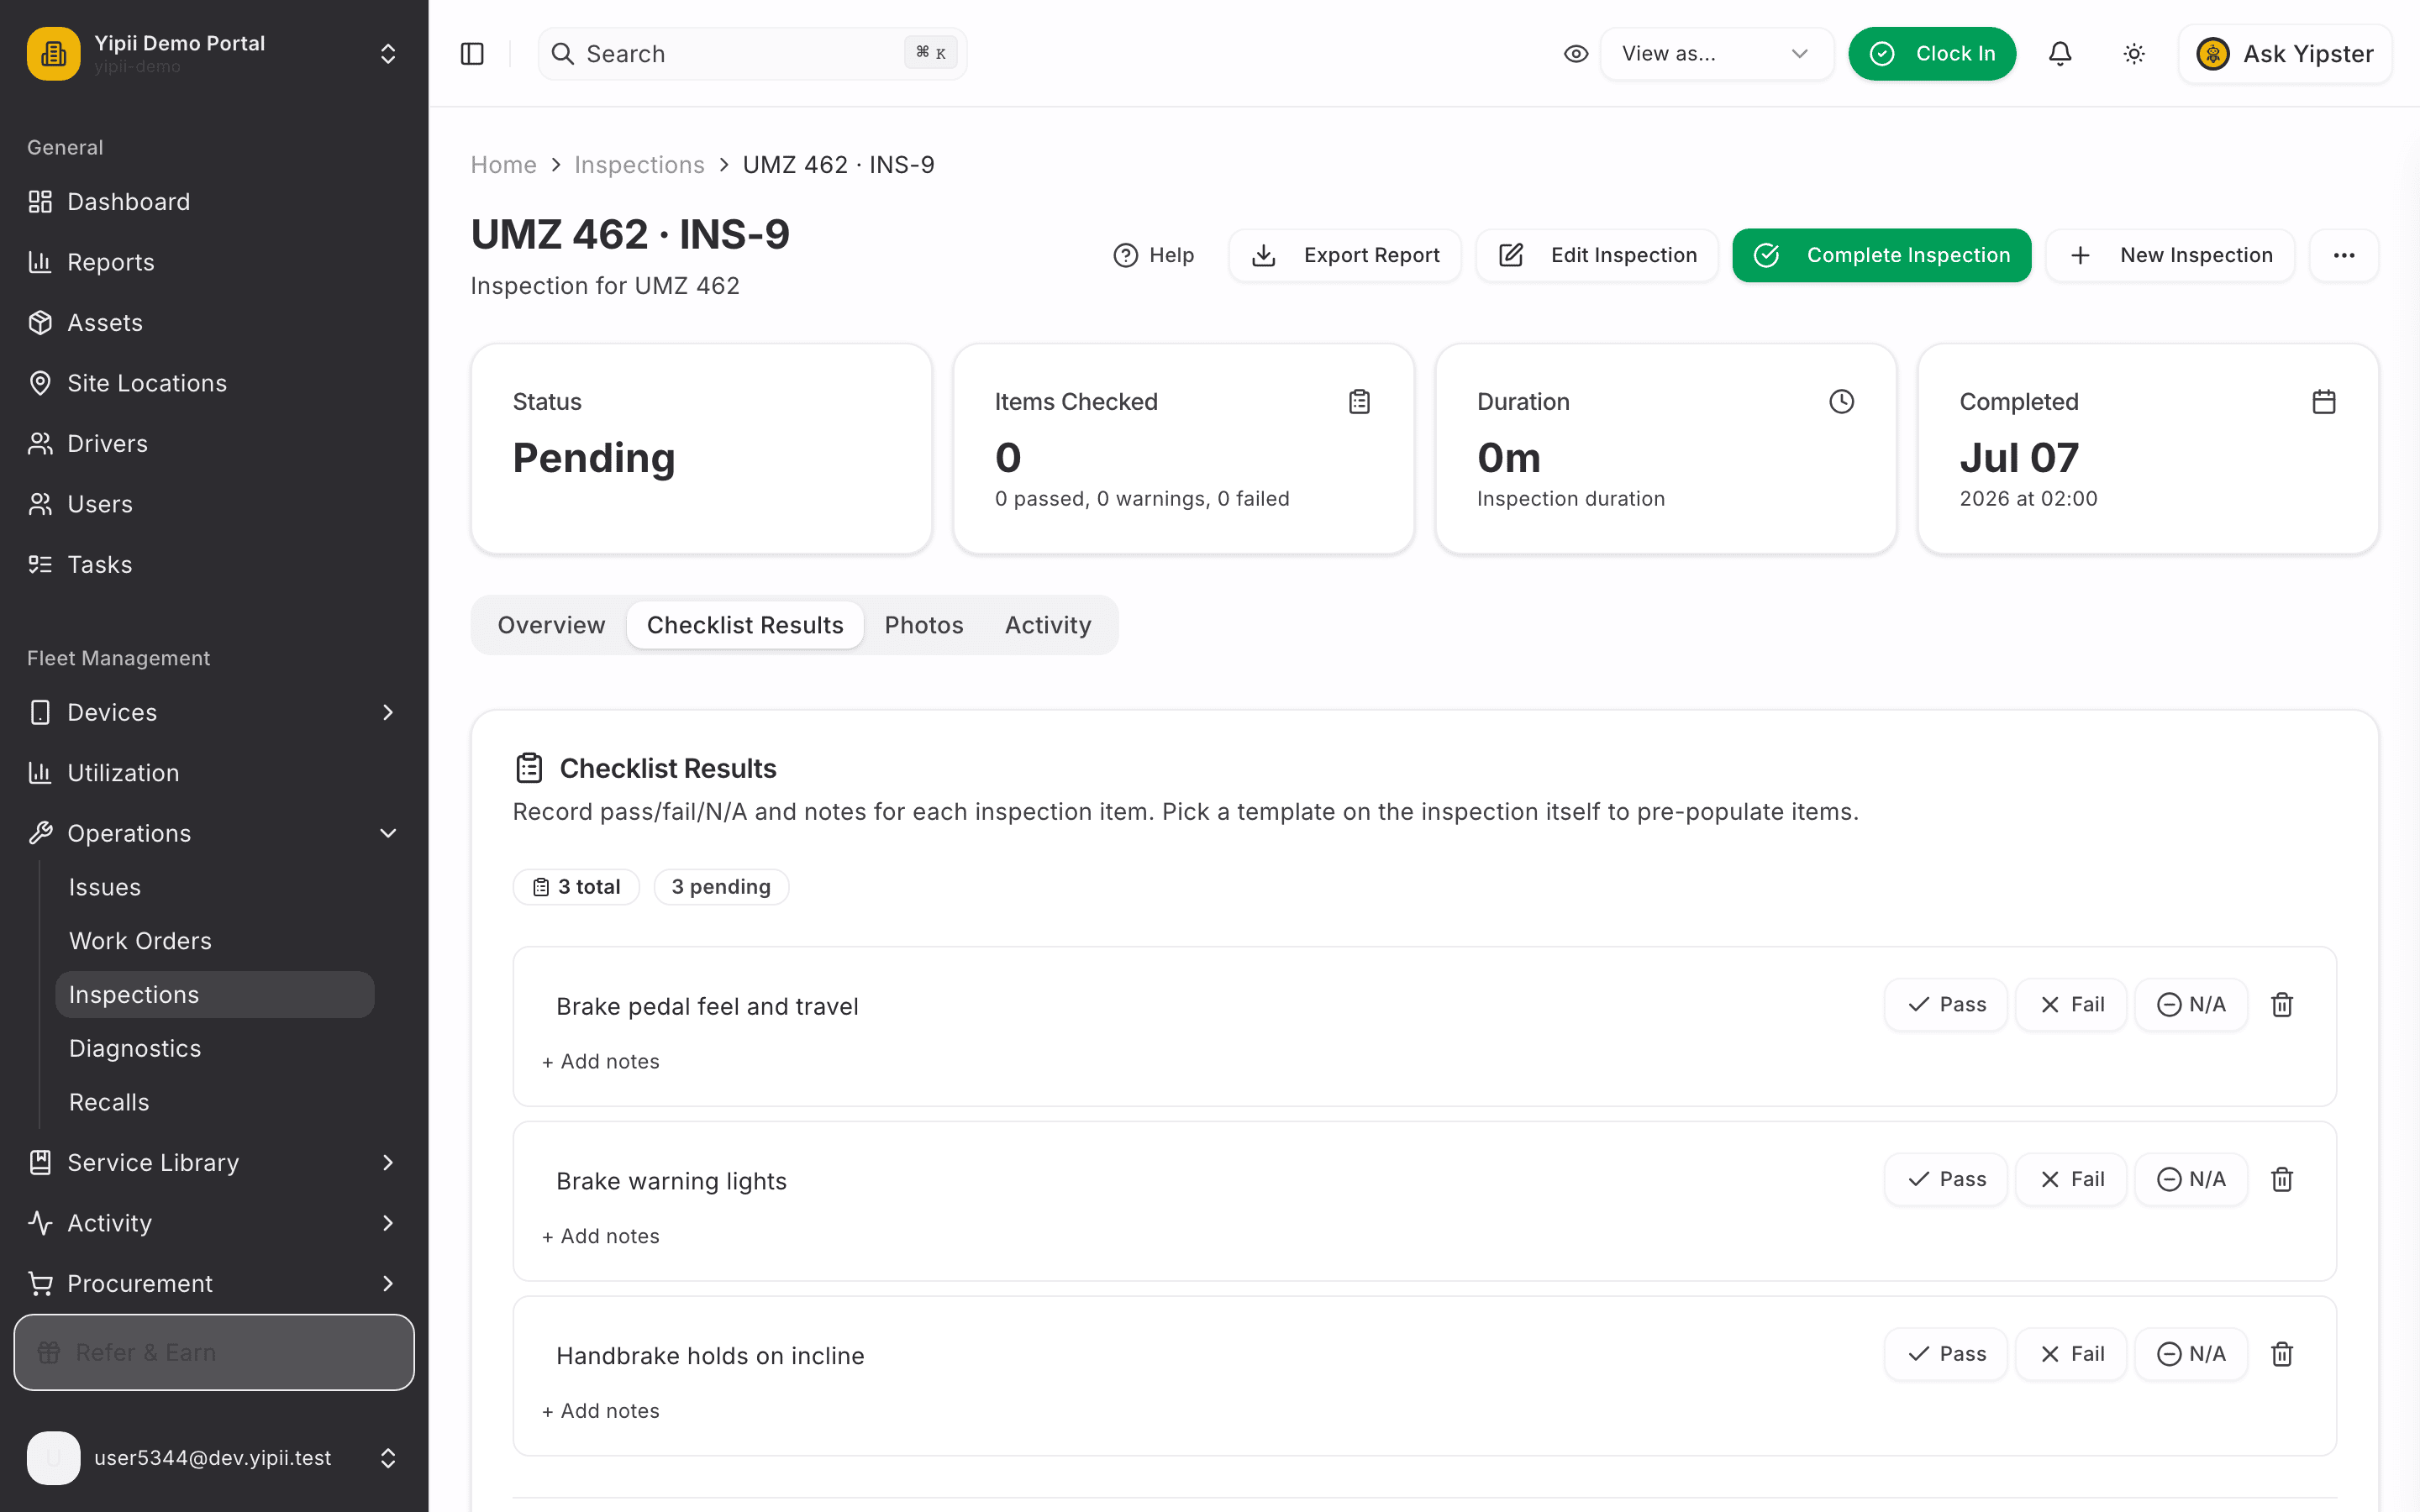
1. Run the inspection
Open the inspection's Checklist Results tab as usual (see Perform an Inspection). This one is a brake safety check.
2. Mark the failing item
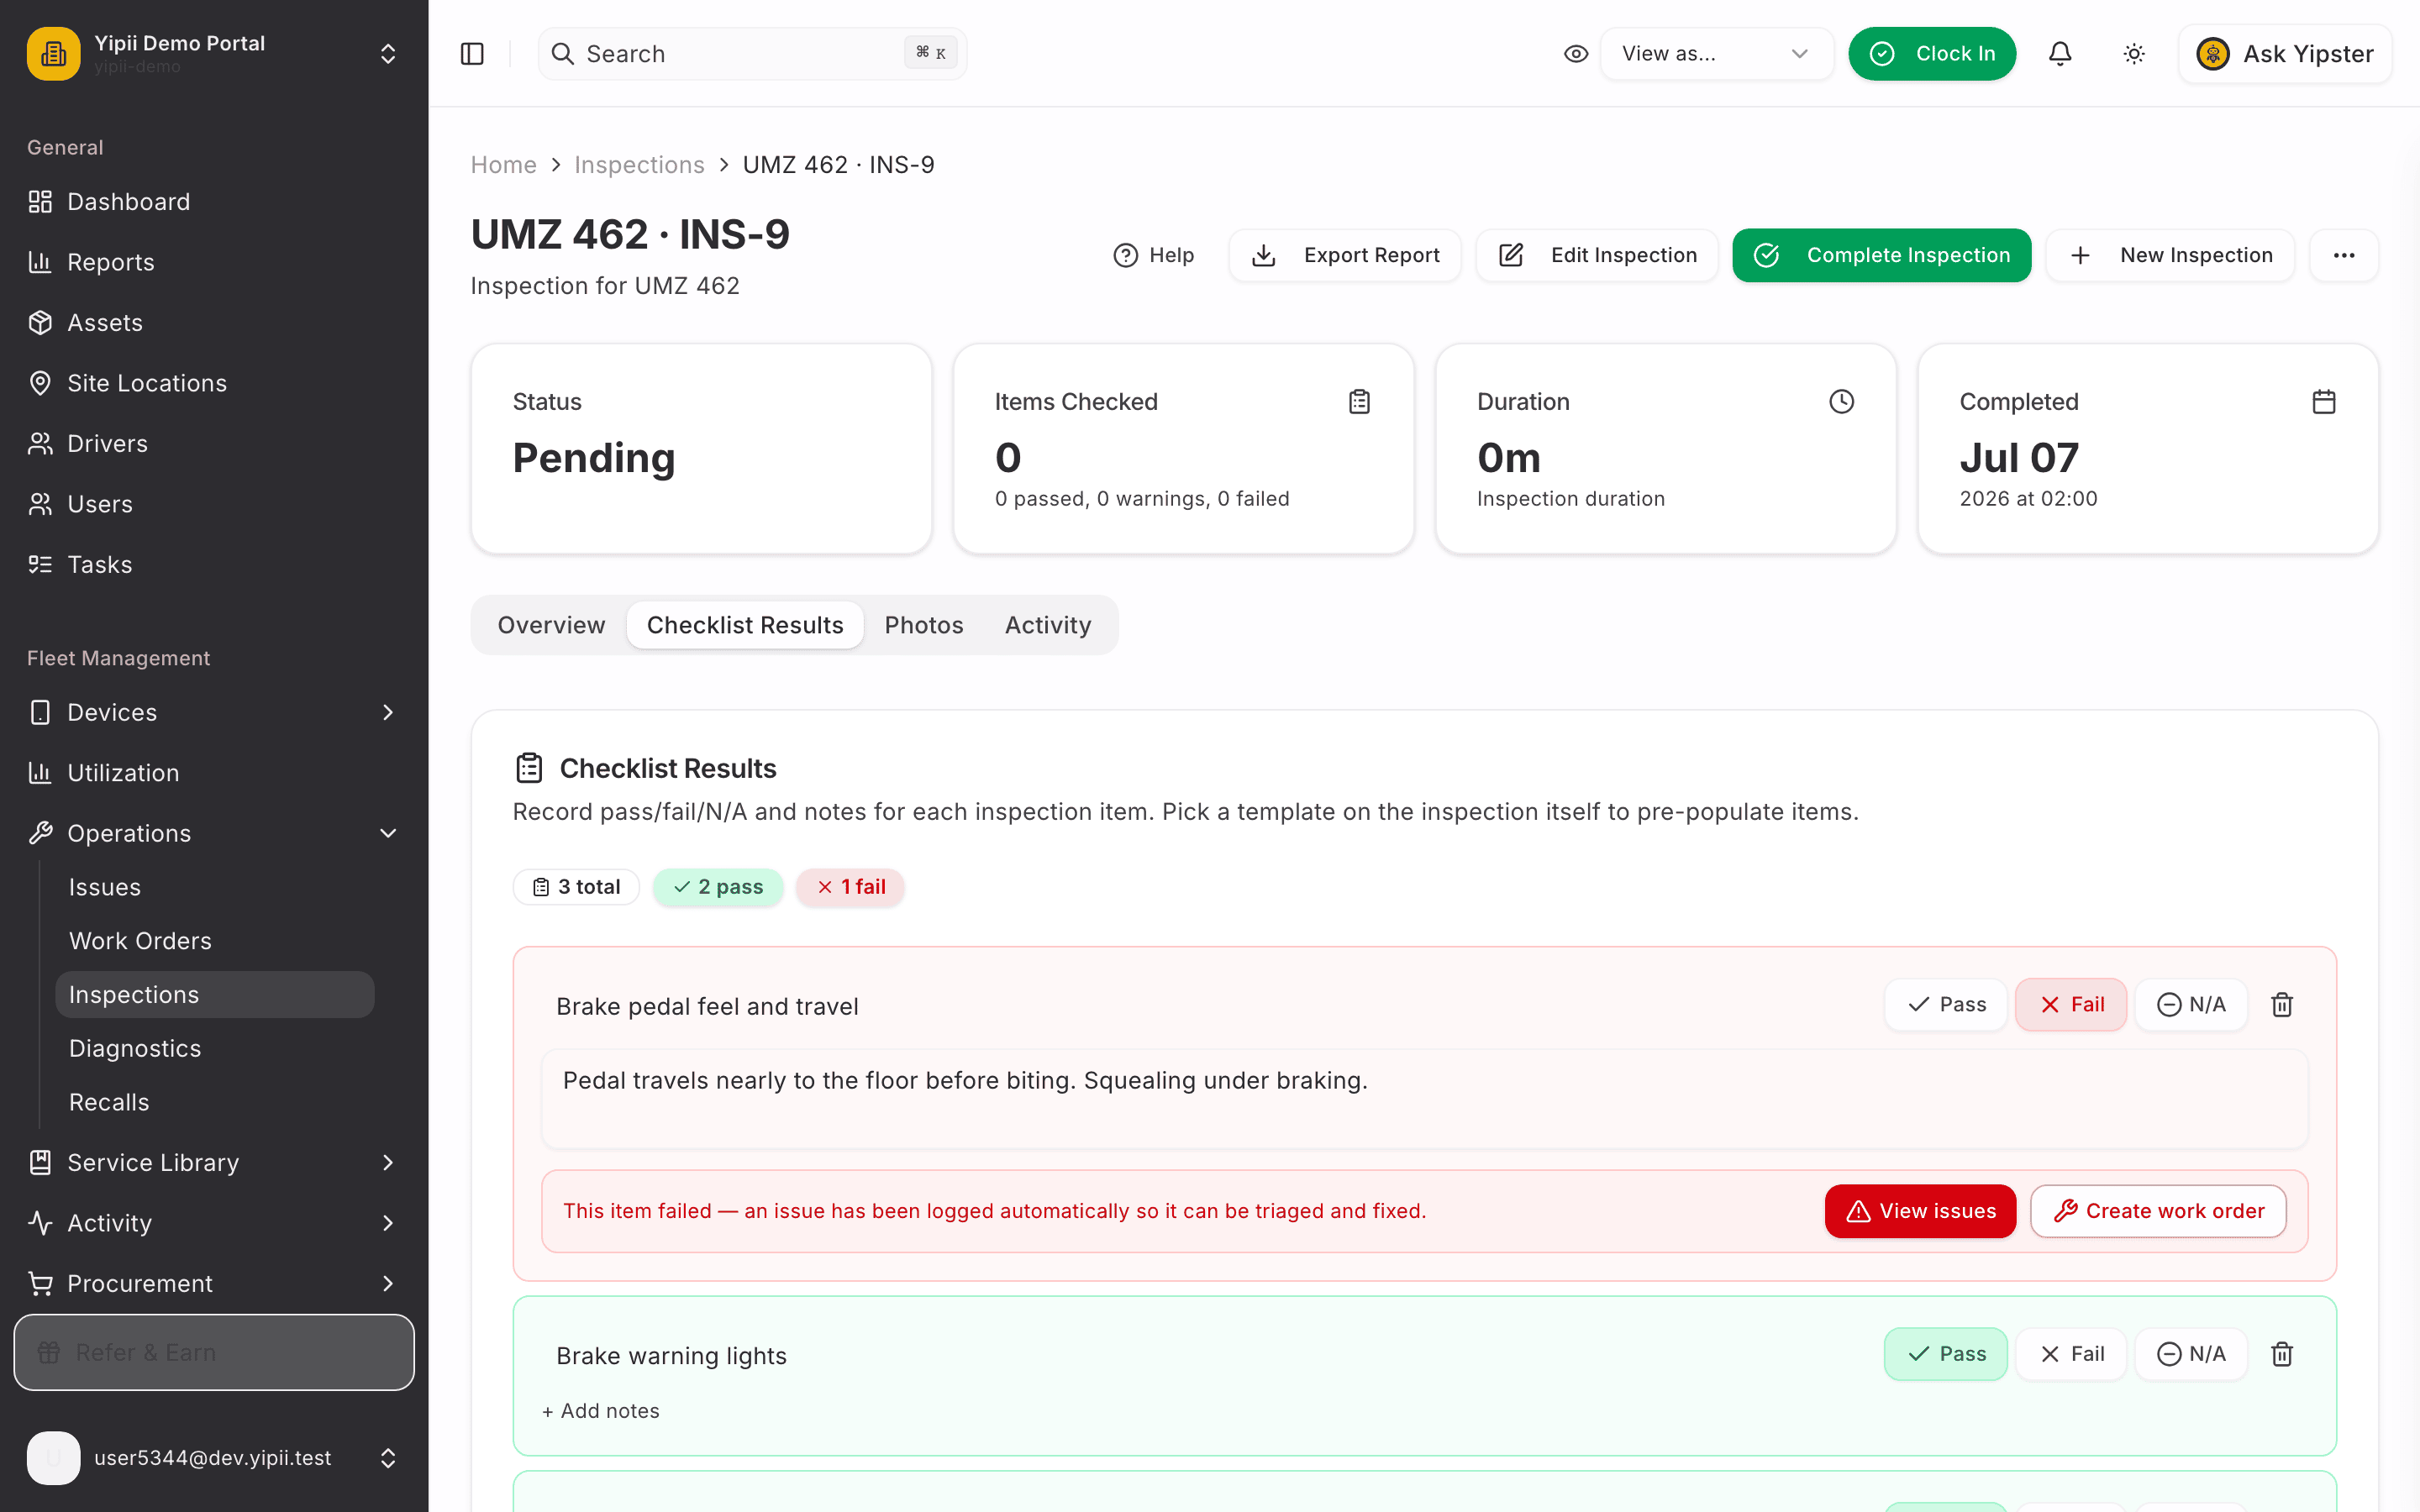
The brake pedal doesn't feel right — mark the item Fail and add a note describing exactly what you observed. Notes matter: they travel with the failure all the way to the workshop.
3. The issue is logged automatically
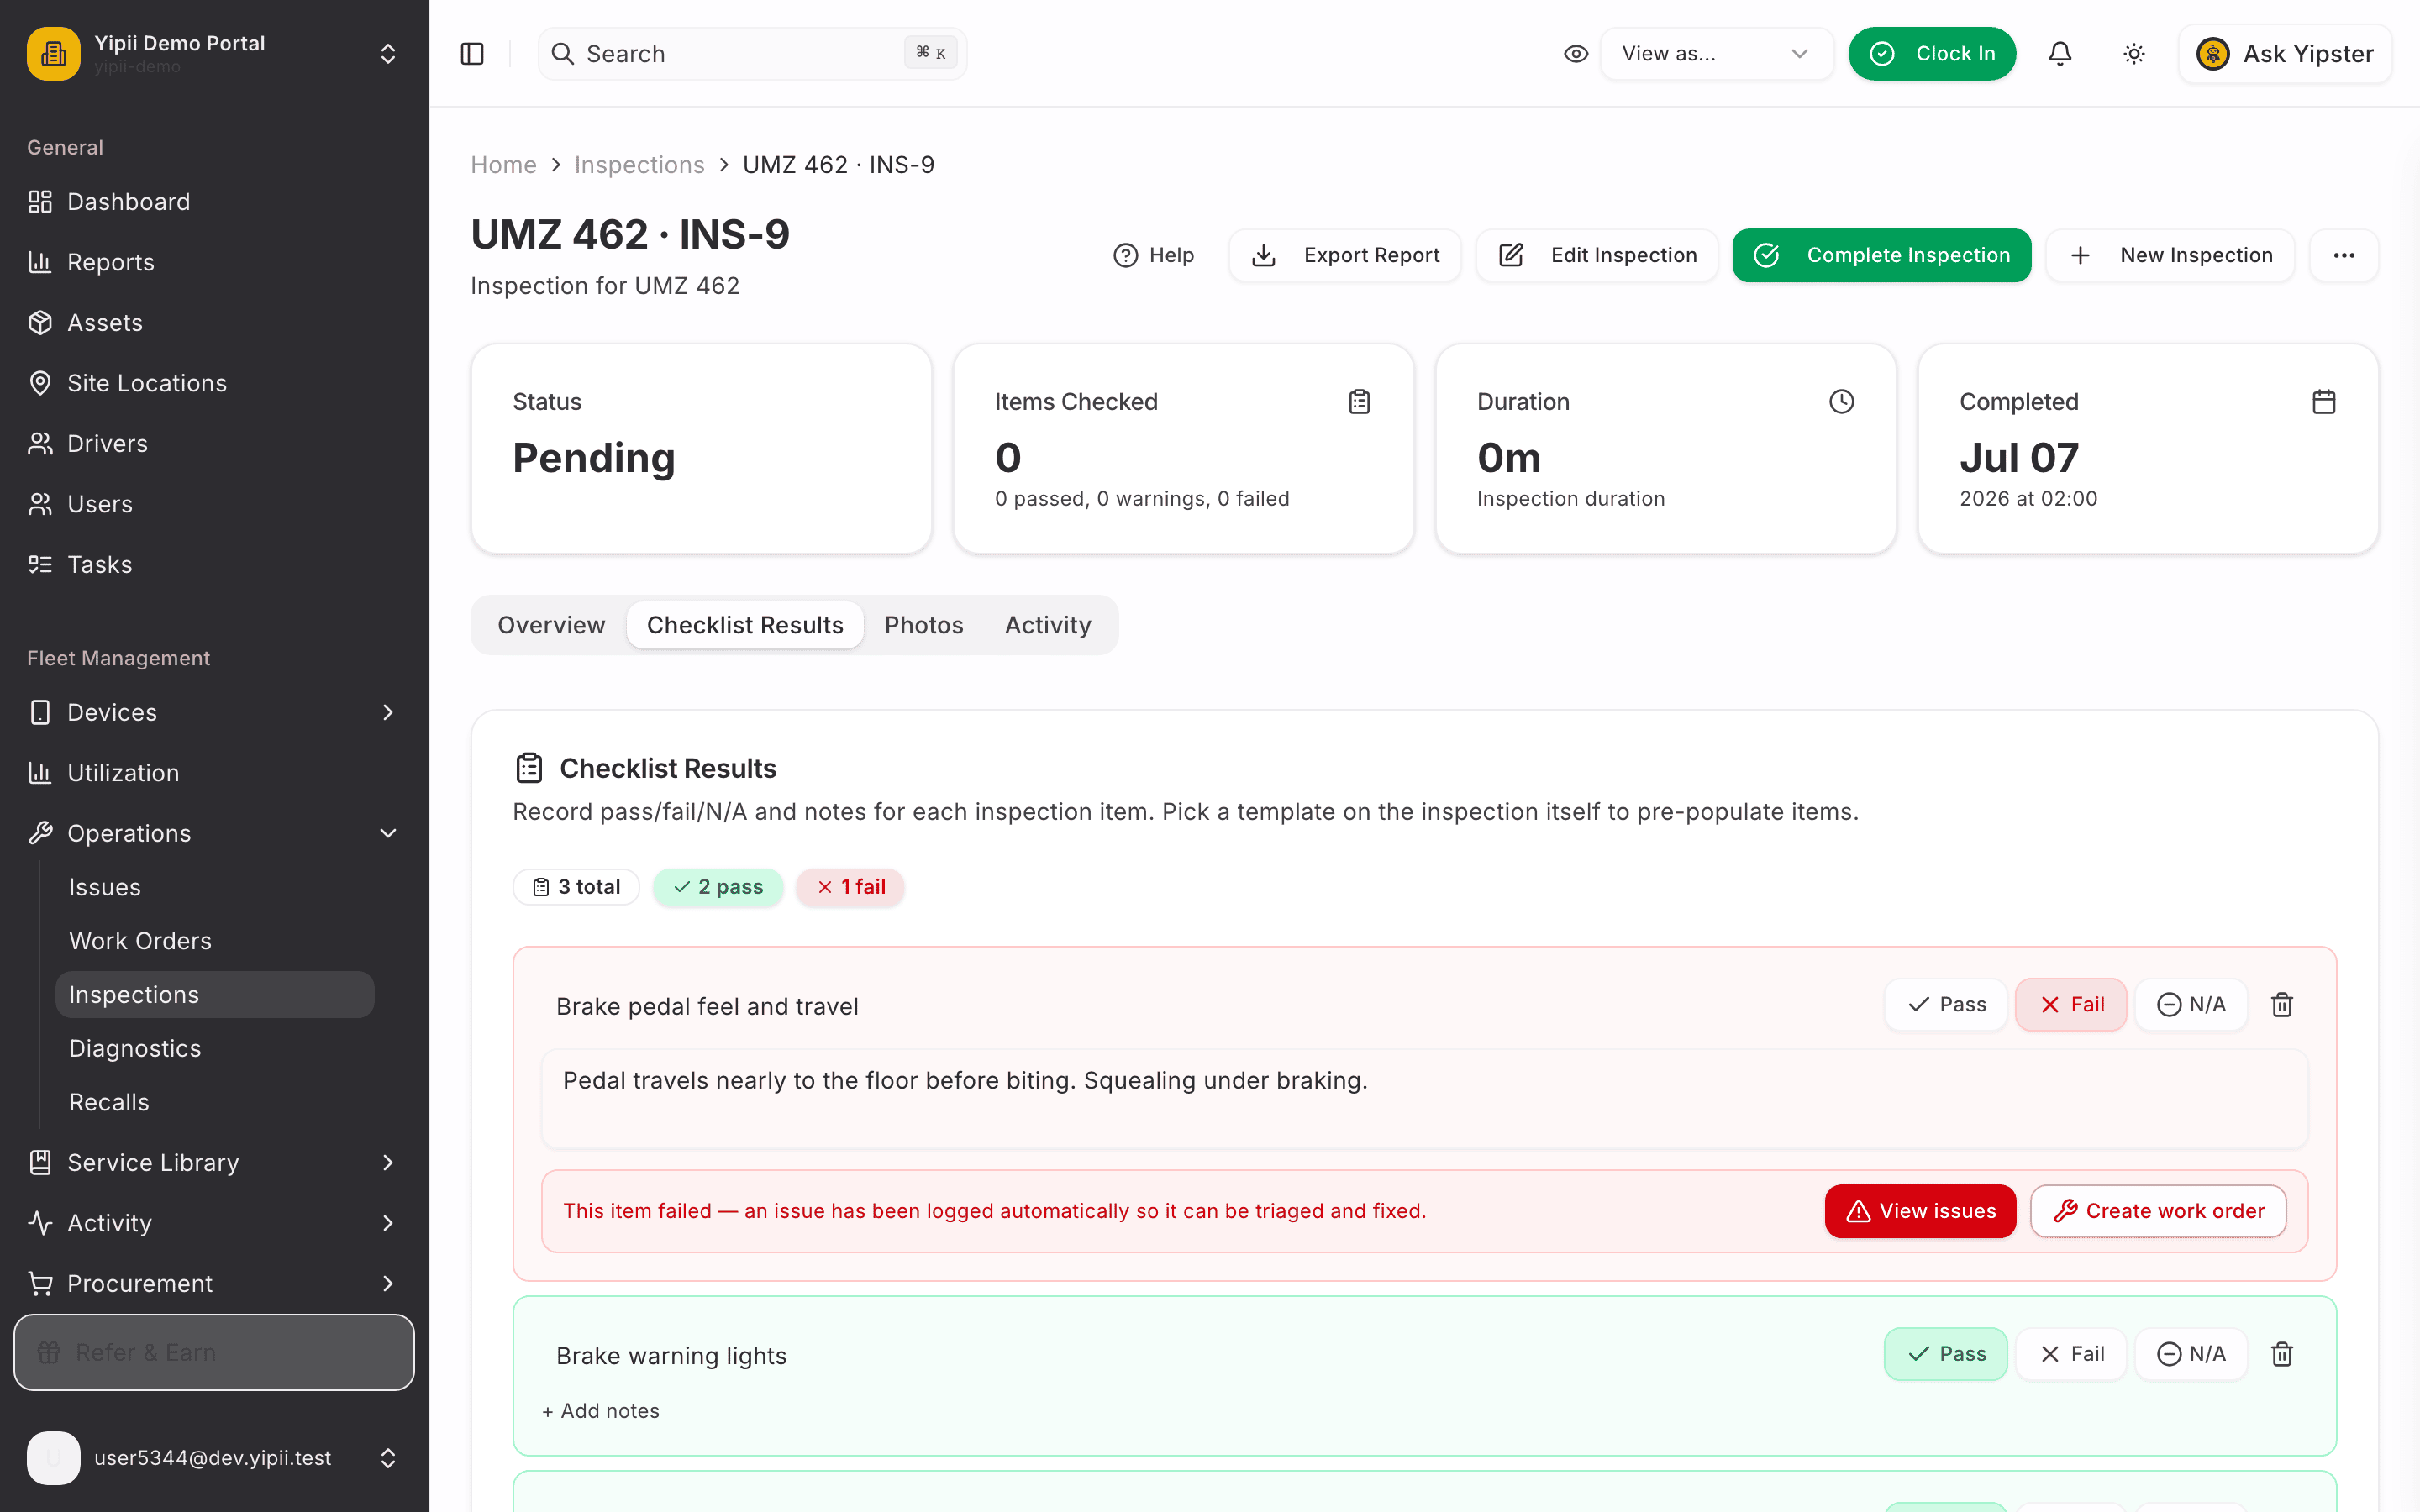
The row turns red and confirms it: an issue has been logged automatically for this failure. Nothing to fill in — the vehicle, the failed item and your notes are already on it. View issues jumps to the board, and Create work order is there as a direct shortcut when the fix is going straight to the workshop.
4. Review it on the Issues board
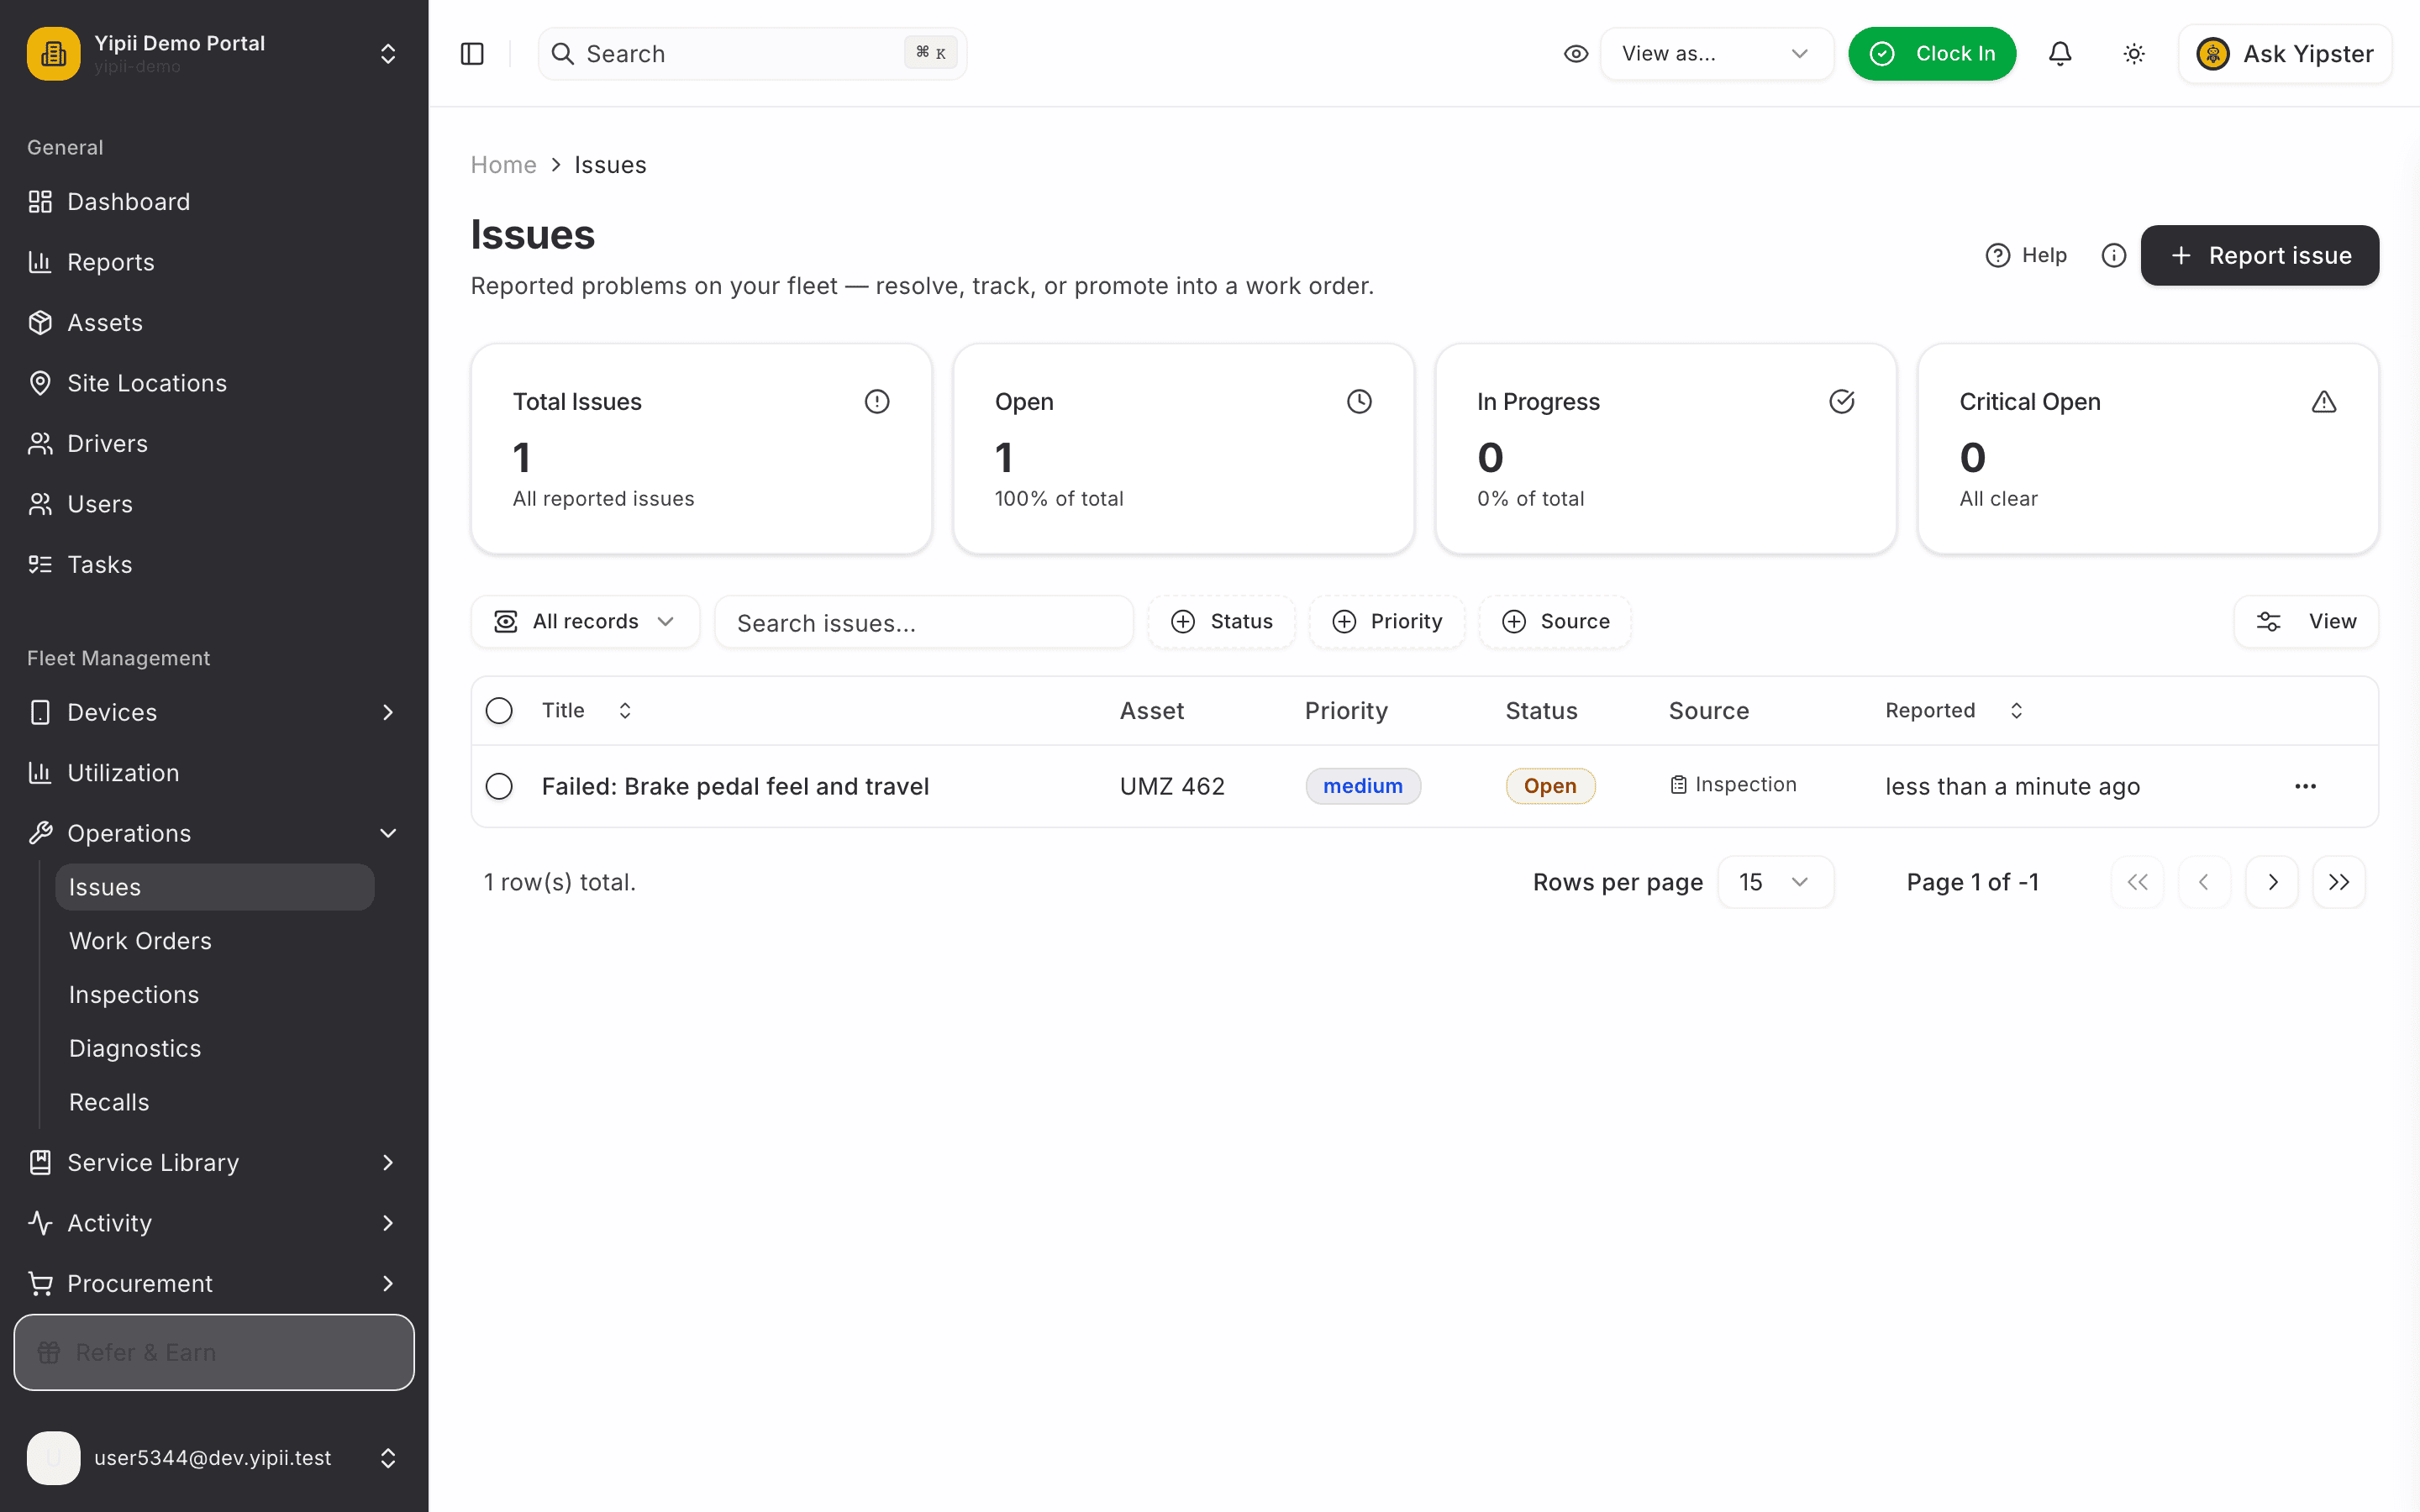
Sidebar → Operations → Issues. The issue is listed as Failed: Brake pedal feel and travel — status Open, source Inspection, so a manager can always tell where a problem came from.
5. Open the issue
Click the issue title. The drawer shows the full context — priority, status, the Auto-created from inspection link back to the source inspection — plus resolve options and Create work order from this issue.
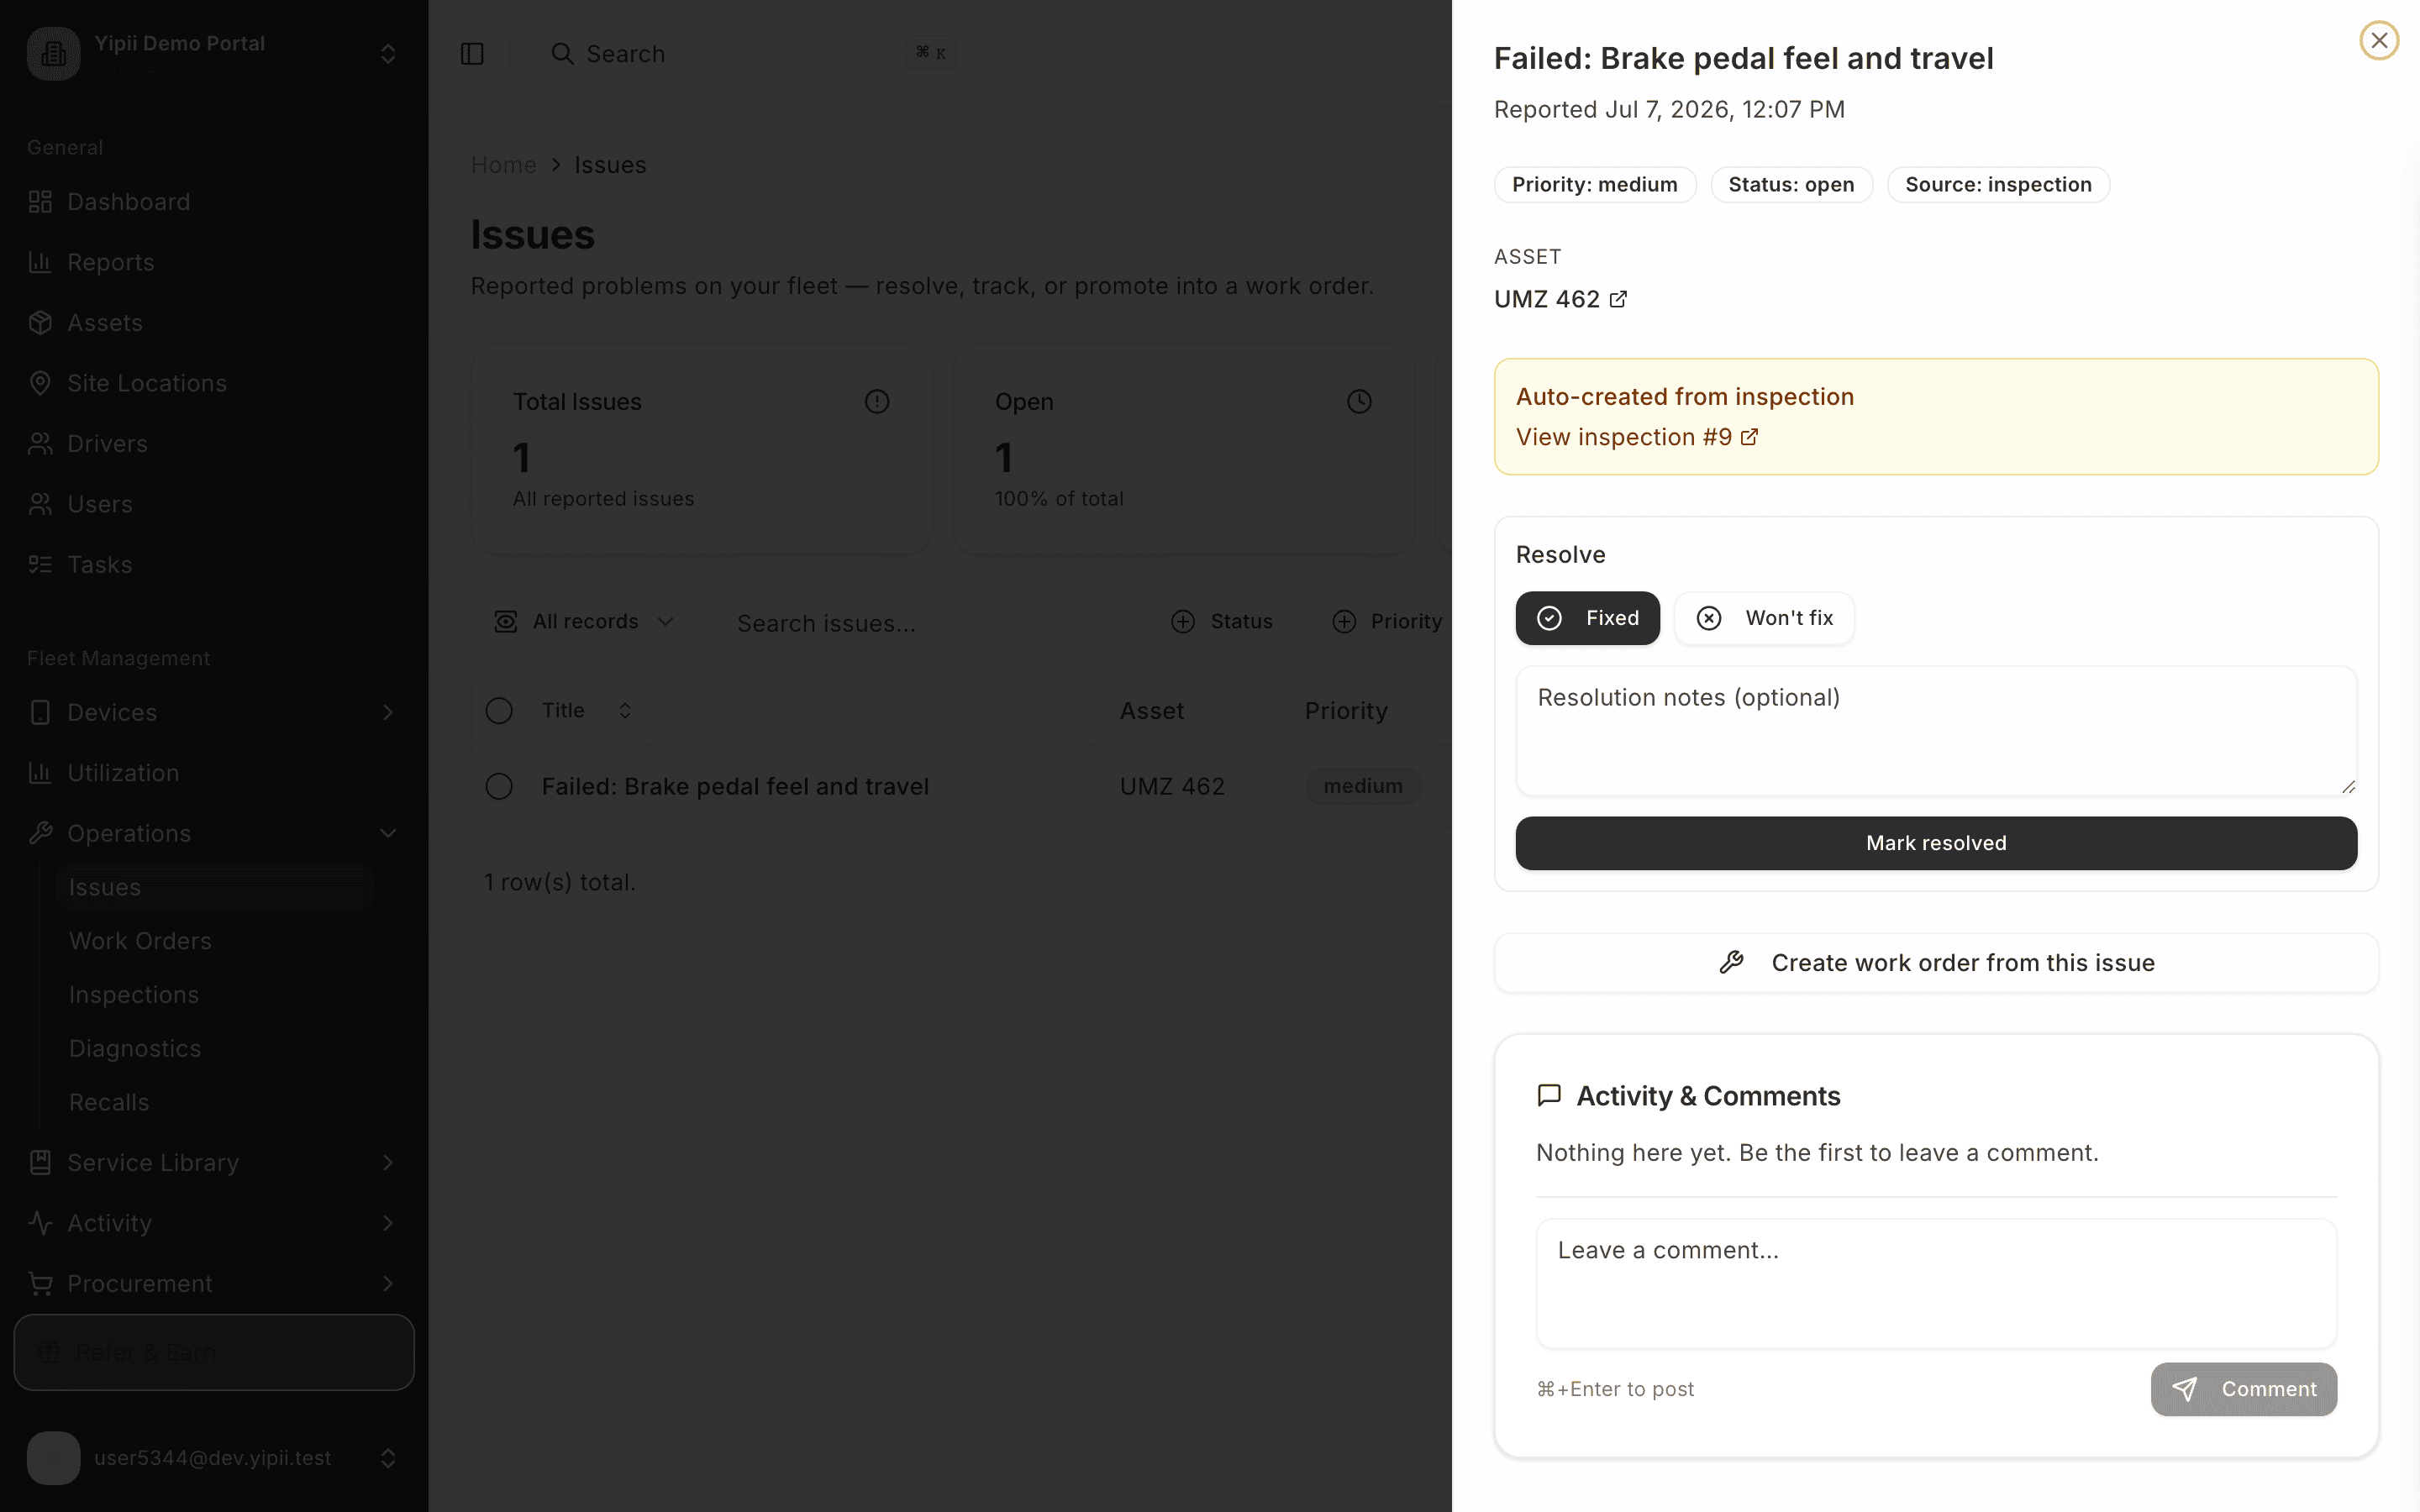
6. Promote it to a work order
Click Create work order from this issue. The dialog seeds the work order from the issue — title, description, a corrective type and a priority mapped from the issue's.
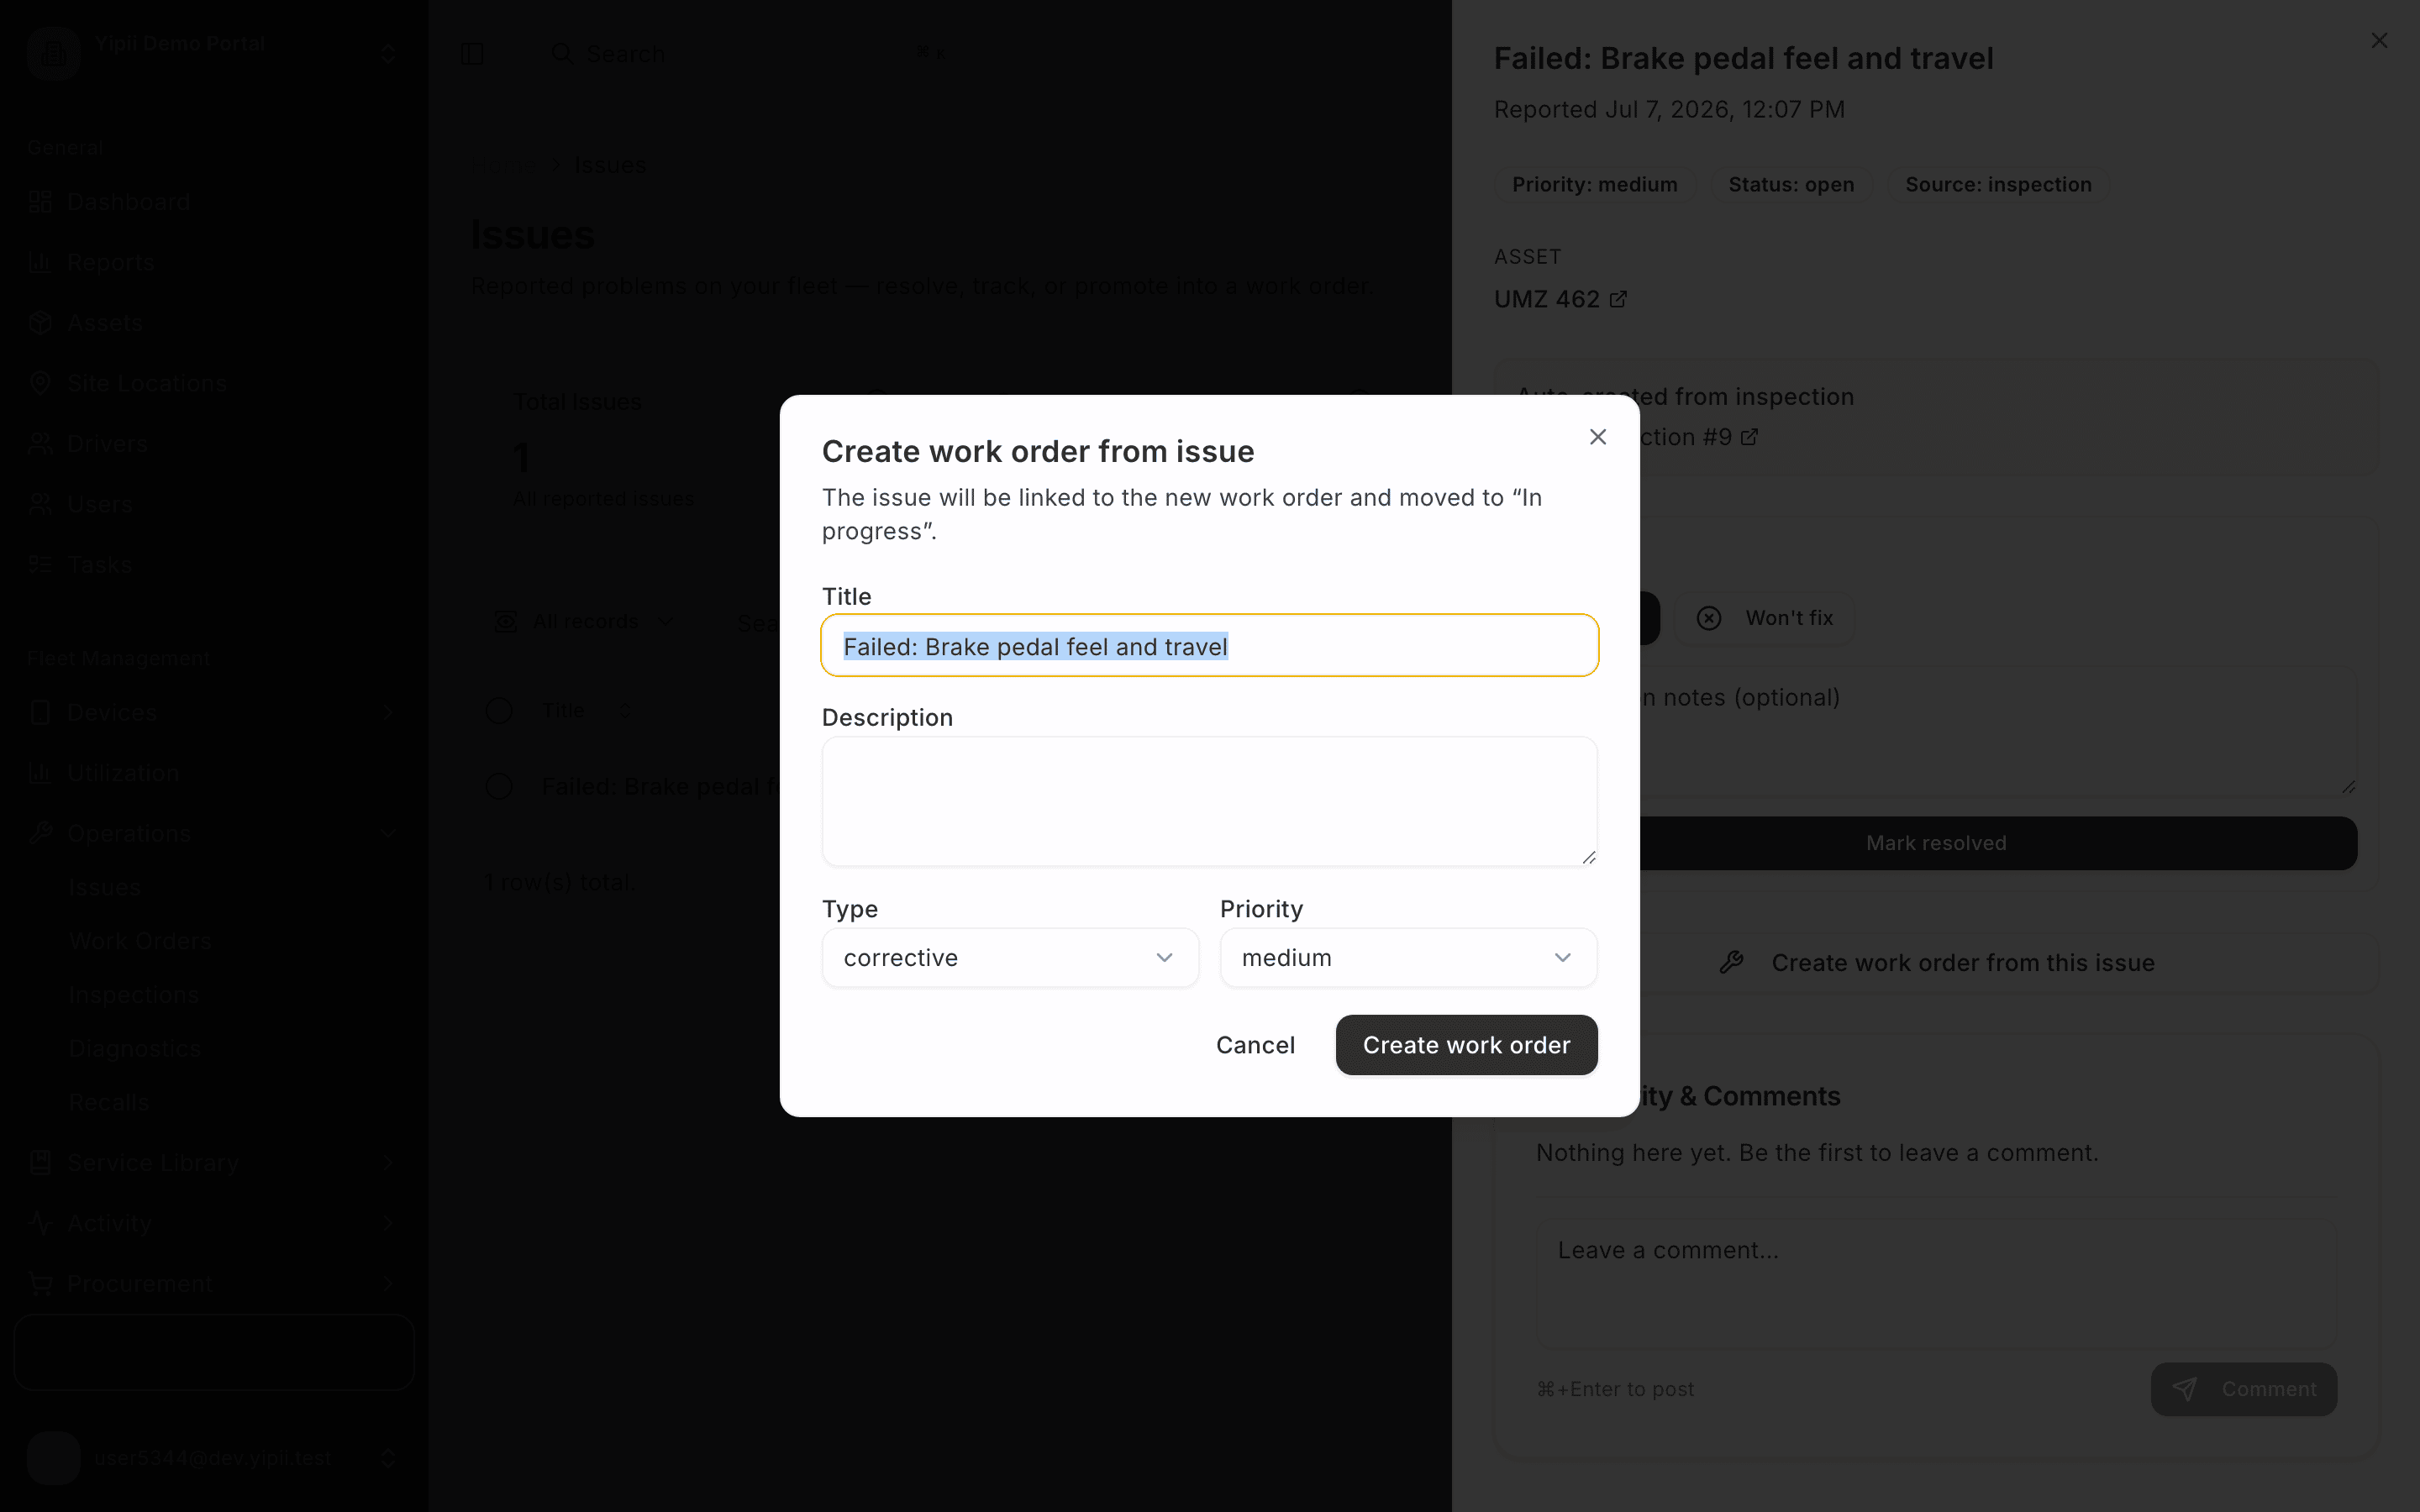
7. Confirm
Click Create work order. The issue moves to In progress and now links to its work order.
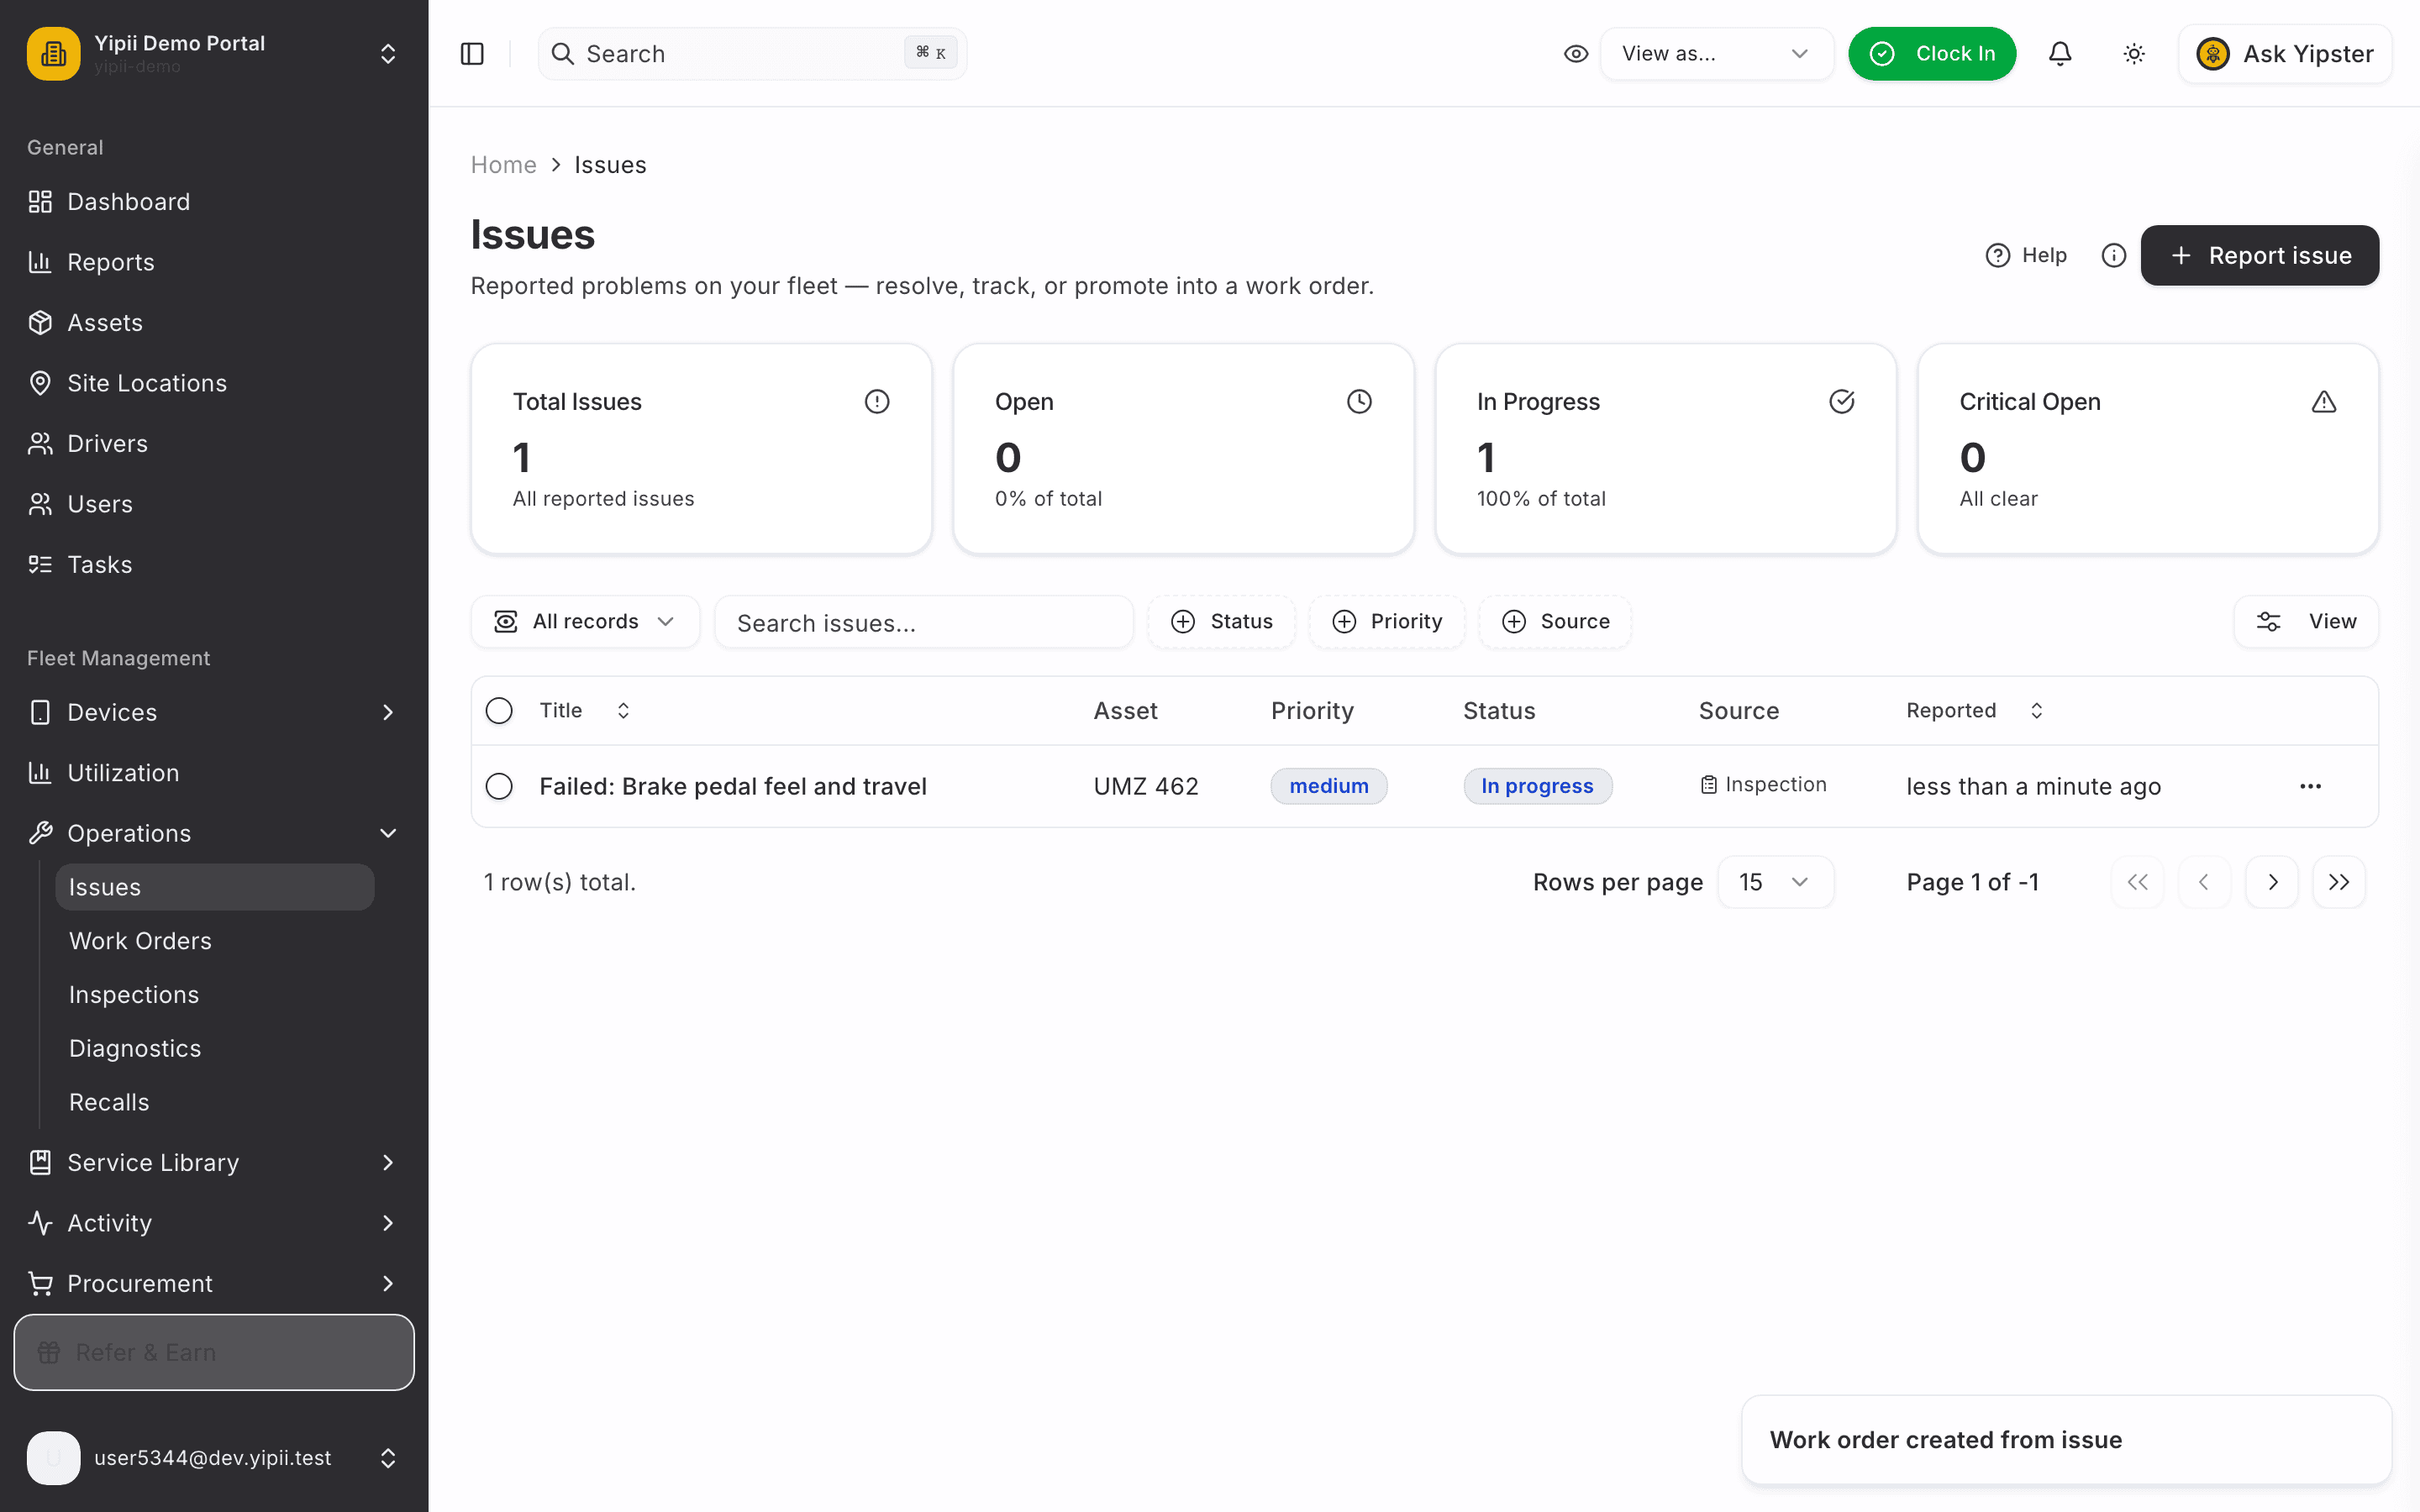
8. Open the work order
Sidebar → Operations → Work Orders → the new corrective work order. Assign a technician, add parts and labor, and track the repair here.
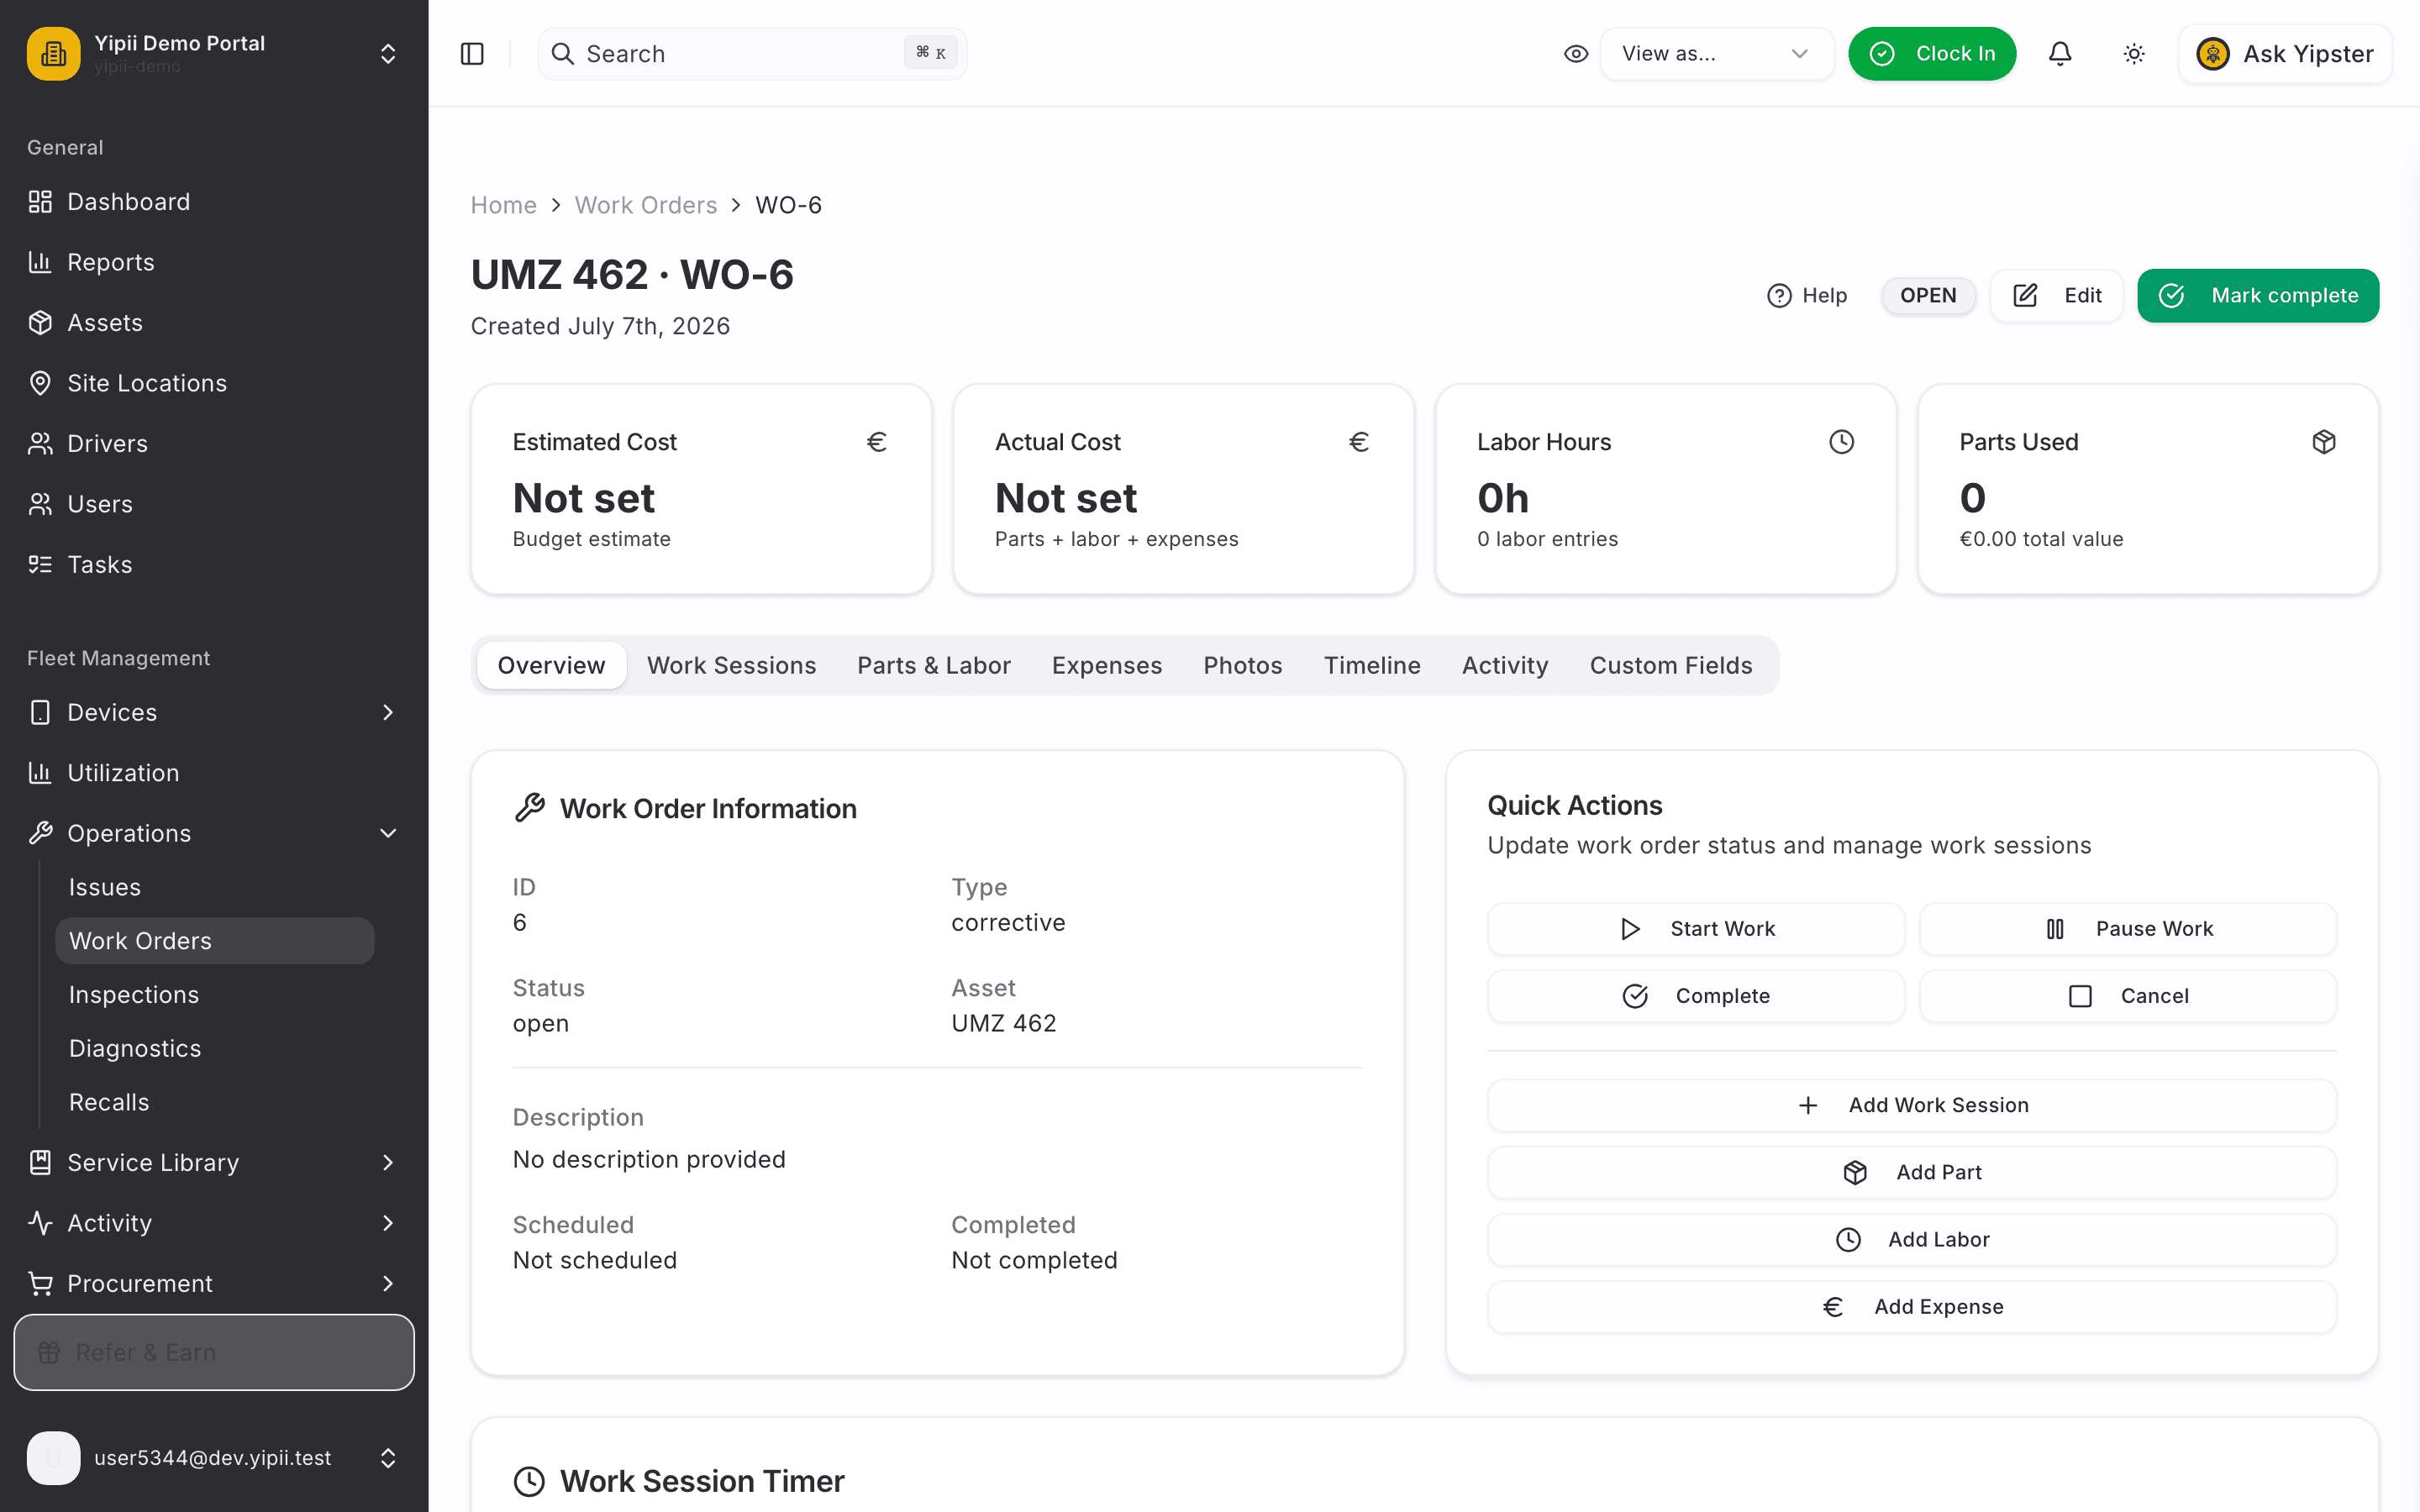
9. Complete the work order
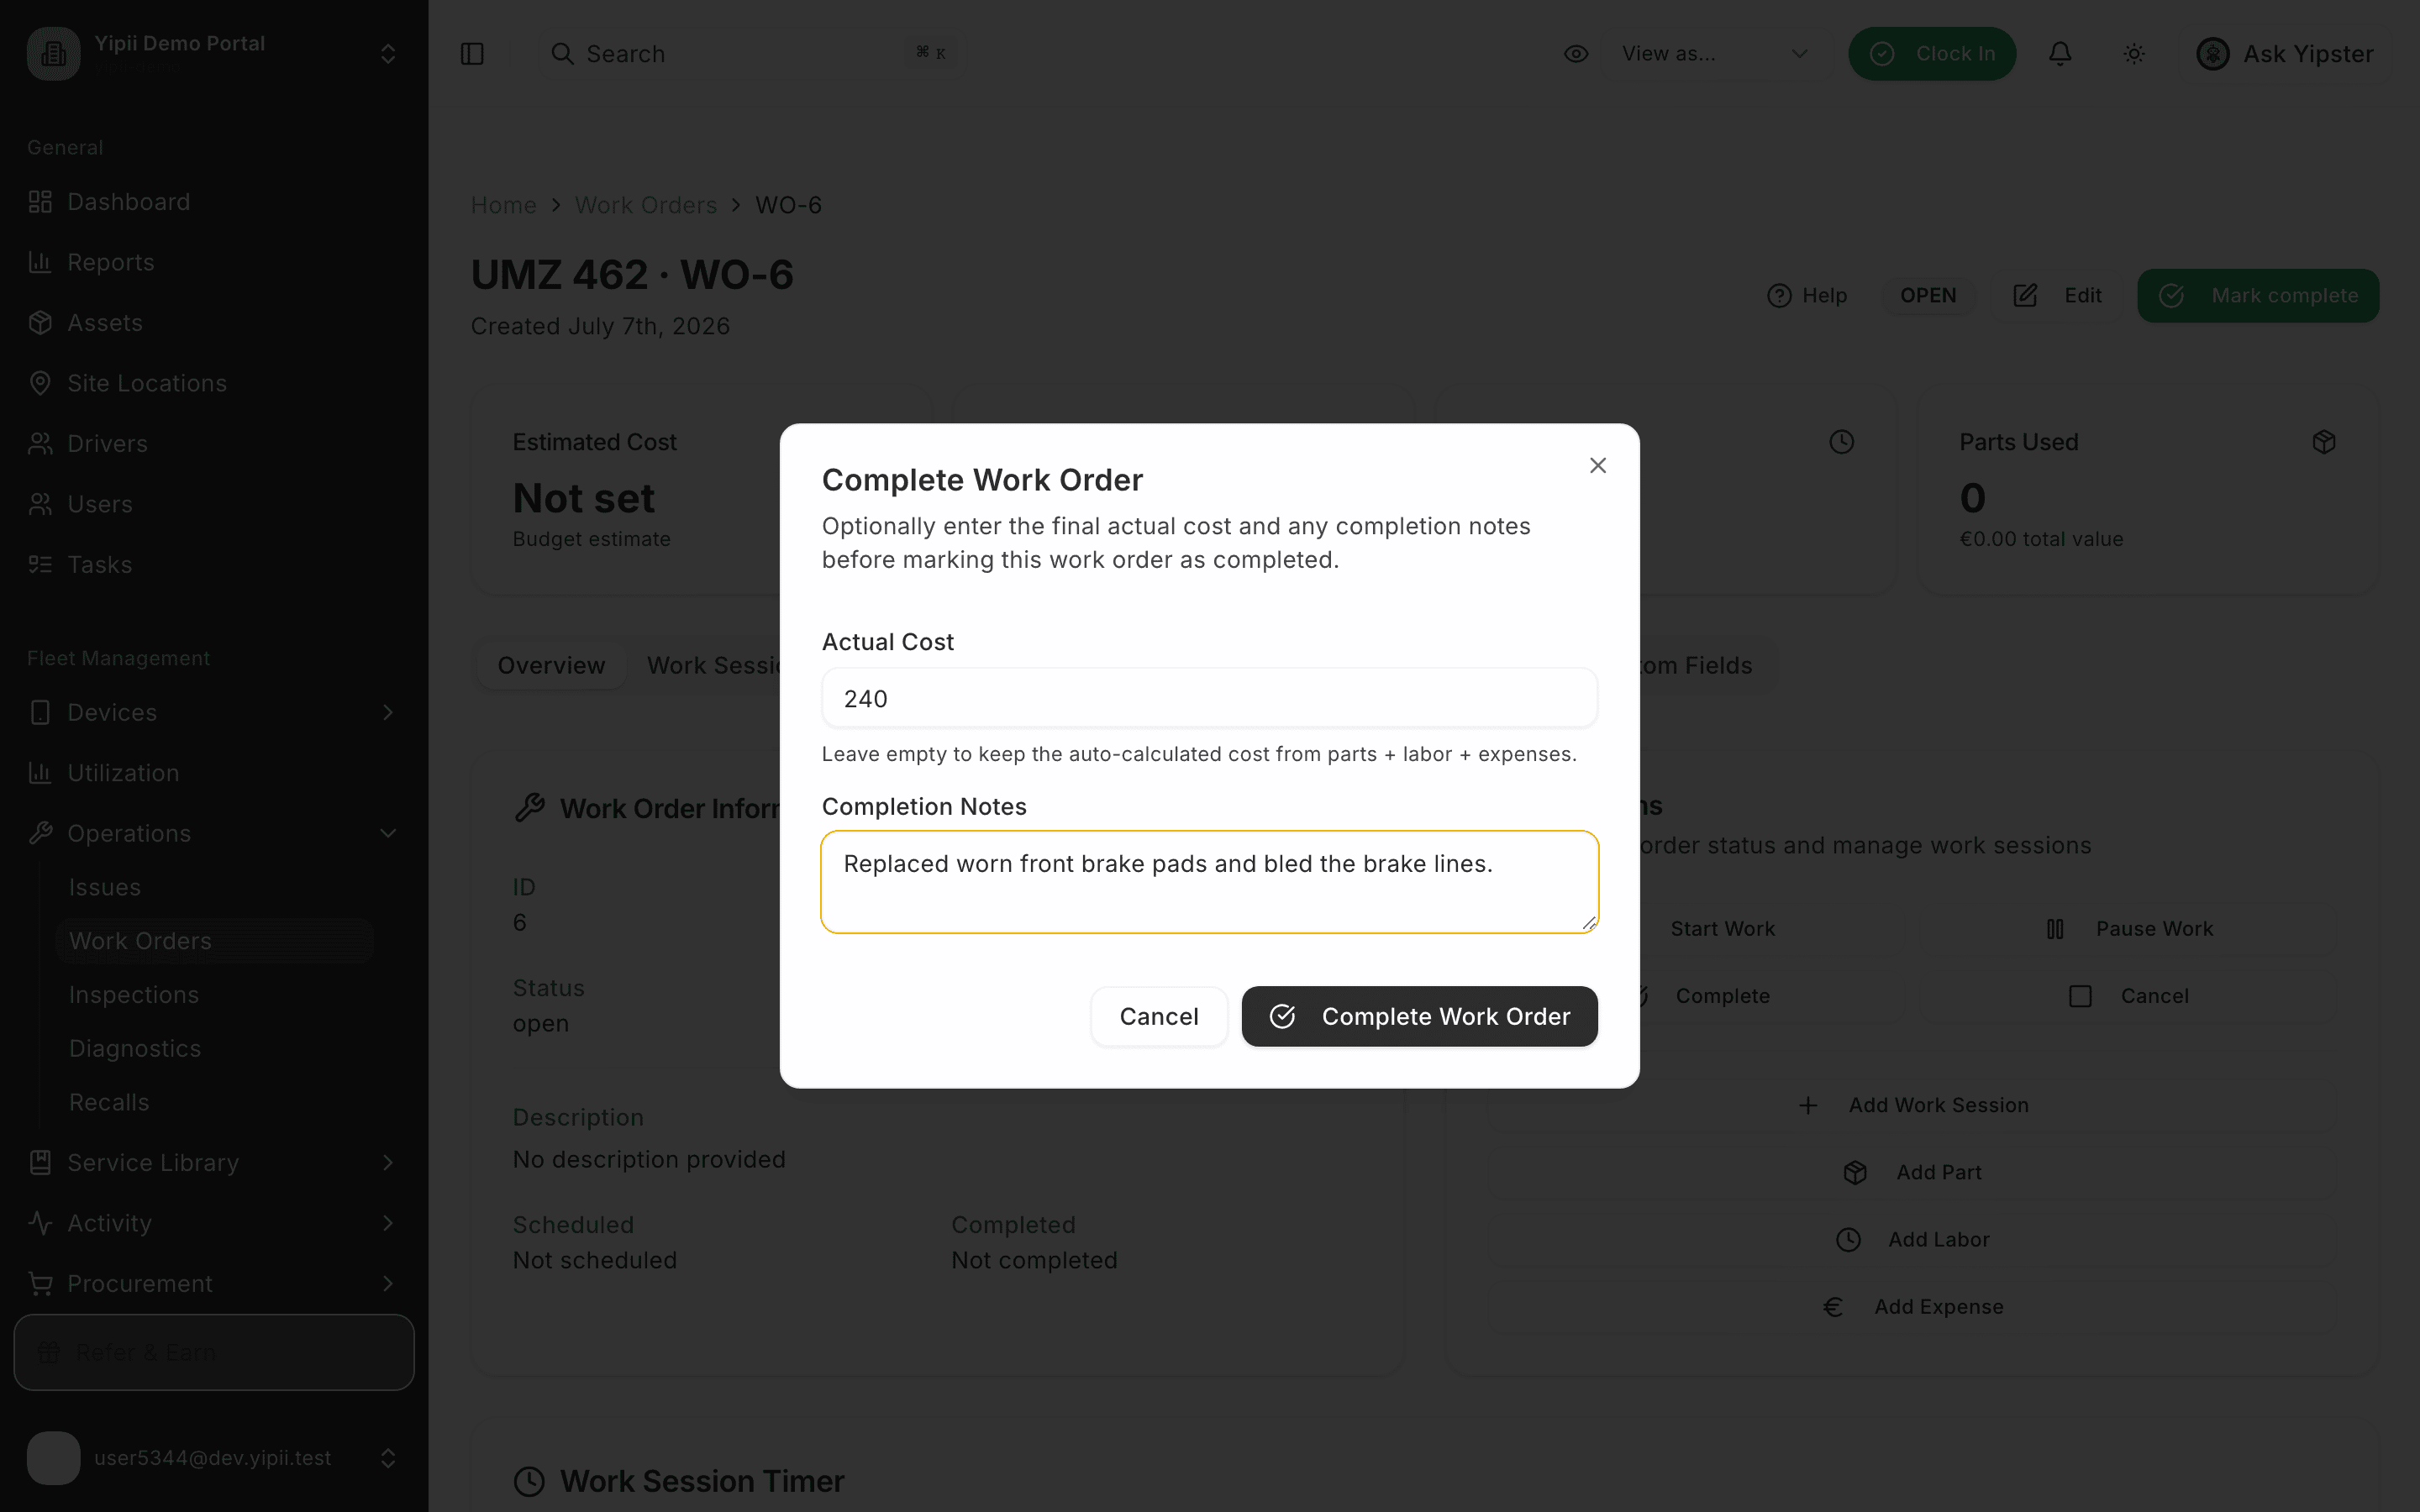
Once the brakes are fixed, click Mark complete. Record the actual cost and completion notes, then confirm with Complete Work Order.
10. Done — the loop is closed
What you ended up with
- A failed inspection item with the inspector's notes preserved.
- An automatically-logged issue — zero clicks, traced back to the inspection that raised it.
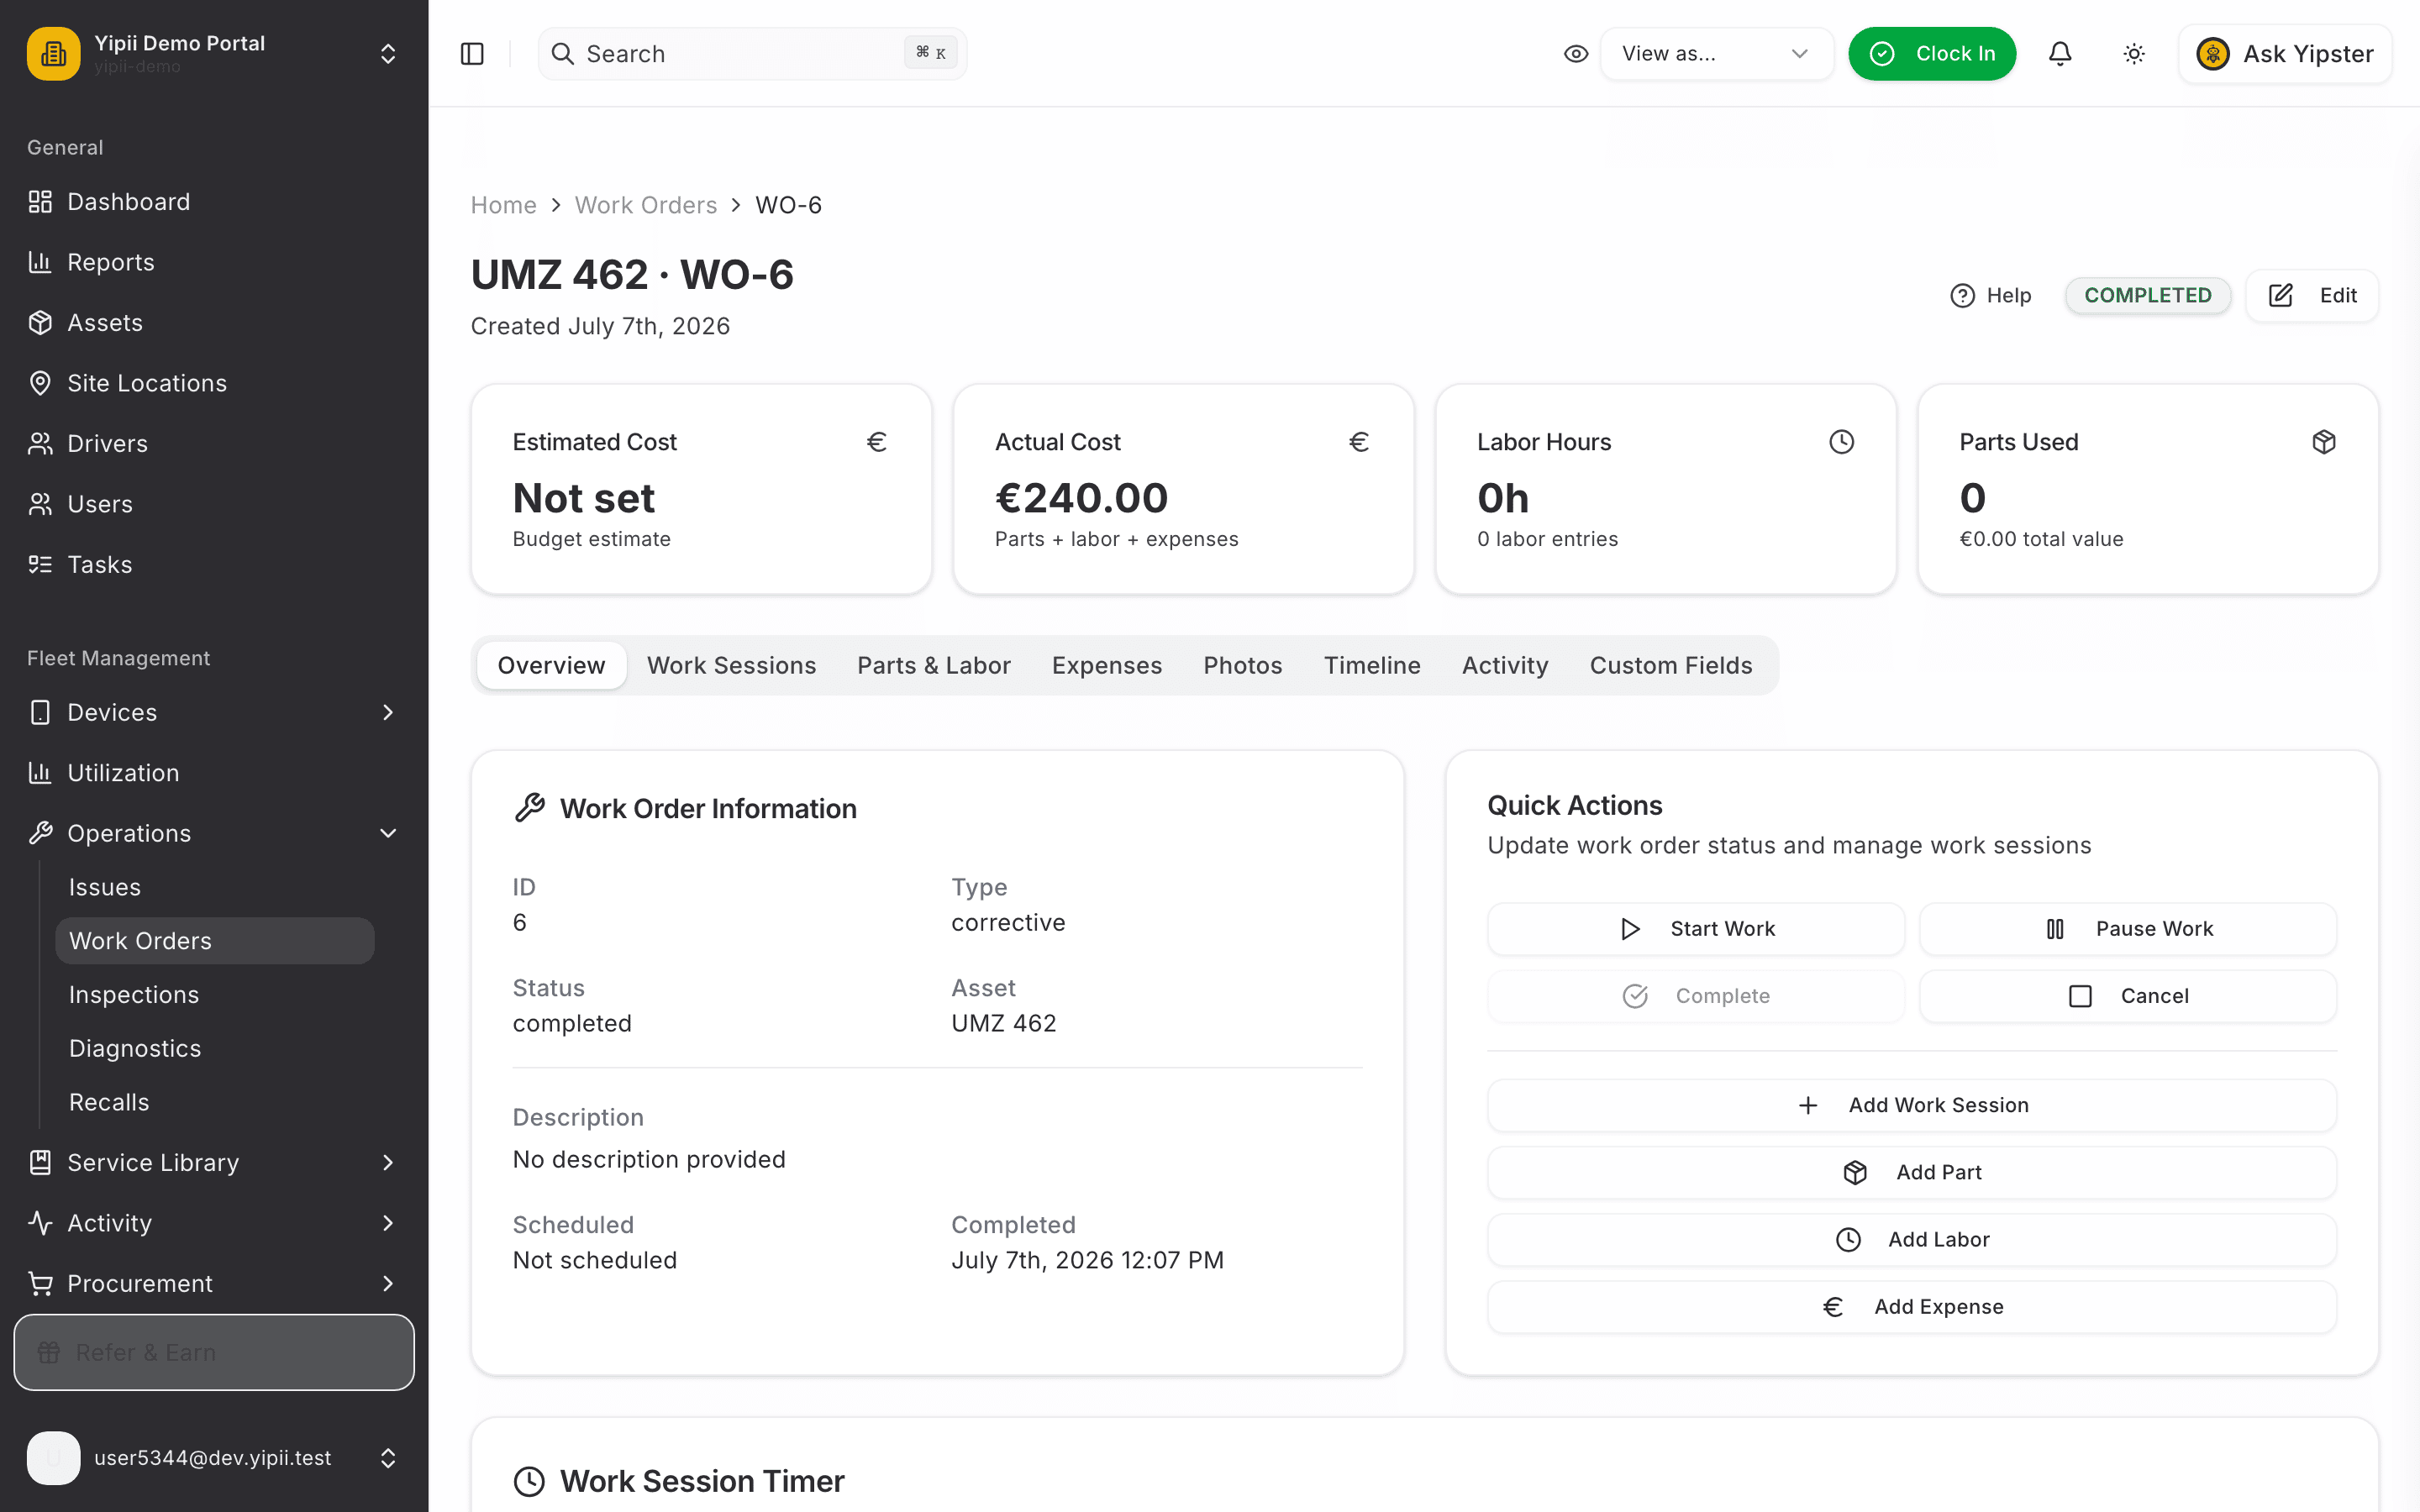
- A completed corrective work order with actual cost and completion notes, linked to the issue.
The whole chain — inspection → issue → work order — is now part of the vehicle's history.